In this post of our Electron series, we'll learn how to package your Electron application with electron builder so you can distribute it.
There are two ways to distribute your app. You can simply make your source code public, let users download it, package it, and run the app for themselves.
Distributing source code has two disadvantages:
- it's inconvenient - depending on your app, your users might not have the tools to run or package your app
- you don't want to make your app's source code public and available to download for everyone.
Distributing your app as a package is probably the best way to get your software to users.
There are two main ways to package an electron app:
- manually
- with tooling, such as electron-builder
The manual process involves downloading the Electron executable and setting up a specific directory structure. It's more complicated and includes more steps than using electron-builder; thus, it's more error-prone. However, if you want to see how to do that, check it out here.
I recommend using a tool such as electron-builder for two reasons:
- it's super simple to configure. All your configuration is in the
package.jsonfile of the app, and you can configure multiple distributions in the same place - it automatically creates the appropriate directories; this includes setting up the correct way to handle the app assets if you have any
Setup
We will modify the package.json file from our first blog post Build a JavaScript Desktop app with Electron.
First, you'll have to add the electron-builder package as a dev dependency:
npm install -D electron-builder
After this, we will add one new script to our "scripts" section of package.json:
"dist": "electron-builder"
Running npm run dist will generate operating-system-specific packages, such as dmg, deb, or whatever you tell the configuration to generate, depending on which platform you're running this command.
For example, I'm running this on macOS, so it'll generate macOS-specific files for me.
You don't have to generate a package for all OSes, but let's see how to control that with electron-builder configuration.
Configuration
electron-builder can be conveniently configured by adding a build section to the package.json file of the Electron app:
{
  "name": "electron-blog-example",
  ...
  "scripts": {
    "start": "electron .",
    "dist": "electron-builder"
  },
  "build": {
    "appId": "electron-blog-example",
    "dmg": {
      "title": "${productName} ${version}"
    },
    "linux": {
      "target": [
        "AppImage",
        "deb"
      ]
    },
    "win": {
      "target": "NSIS",
      "icon": "build/icon.ico"
    }
  },
  ...
  "devDependencies": {
    "electron": "^20.0.2",
    "electron-builder": "^23.3.3"
  }
}
Let's go over the top-level keys inside "build":
appId
Although you're not required to set it, I strongly recommend doing so.
For example, on macOS, this key is used to associate app-specific configuration, such as notifications with the app itself or whether the app is capable of opening specific files.
Windows uses this ID to associate processes, files, and windows to this particular application.
Per-platform options
As you might have already guessed, these three keys are the per-platform configurations. dmg is for macOS, and the others are self-explanatory.
What you see in the above package.json file are also the default values.
You'll find all os-specific configurations here:
- DMG - https://www.electron.build/configuration/mac
- Linux - https://www.electron.build/configuration/linux
- Windows - https://www.electron.build/configuration/win
Per-platform options override global options.
For example, you could override the global appId only for macOS by specifying it inside the "dmg" configuration:
  ...
  "build": {
    "appId": "electron-blog-example",
    "dmg": {
      "appId": "electron-blog-example-only-for-mac",
      "title": "${productName} ${version}"
    },
  ...
Package the app
Now that our package.json is set up, we're ready to create a packaged version of our application. Head to the terminal and run:
npm i
npm run dist
The output of the last command should look something like this:
% npm run dist

> electron-blog-example@1.0.0 dist
> electron-builder

  • electron-builder  version=23.3.3 os=21.6.0
  • loaded configuration  file=package.json ("build" field)
  • description is missed in the package.json  appPackageFile=/Users/akoskm/Projects/electron-blog-example/package.json
  • writing effective config  file=dist/builder-effective-config.yaml
  • packaging       platform=darwin arch=x64 electron=20.0.2 appOutDir=dist/mac
  • default Electron icon is used  reason=application icon is not set
  • skipped macOS application code signing  reason=cannot find valid "Developer ID Application" identity or custom non-Apple code signing certificate, it could cause some undefined behaviour, e.g. macOS localized description not visible, see https://electron.build/code-signing allIdentities=     0 identities found
                                                Valid identities only
     0 valid identities found
  • building        target=macOS zip arch=x64 file=dist/electron-blog-example-1.0.0-mac.zip
  • building        target=DMG arch=x64 file=dist/electron-blog-example-1.0.0.dmg
  • building block map  blockMapFile=dist/electron-blog-example-1.0.0.dmg.blockmap
  • building block map  blockMapFile=dist/electron-blog-example-1.0.0-mac.zip.blockmap
Results (macOS)
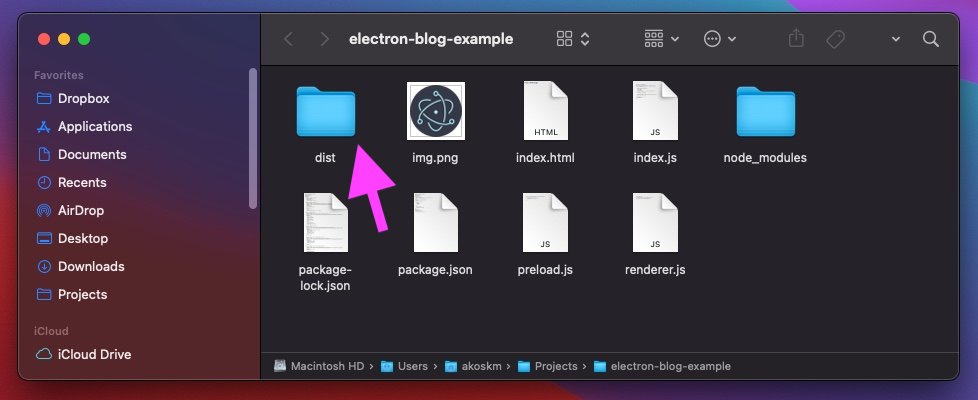
If you're on macOS, typing open . will open the current folder where you'll see a new folder created dist:

This directory contains the files that electron-builder created during packaging:
% ls -lh dist
total 332880
-rw-r--r--  1 akoskm  staff   678B Sep 25 08:28 builder-debug.yml
-rw-r--r--  1 akoskm  staff   240B Sep 25 08:27 builder-effective-config.yaml
-rw-r--r--  1 akoskm  staff    80M Sep 25 08:28 electron-blog-example-1.0.0-mac.zip
-rw-r--r--  1 akoskm  staff    88K Sep 25 08:28 electron-blog-example-1.0.0-mac.zip.blockmap
-rw-r--r--@ 1 akoskm  staff    82M Sep 25 08:27 electron-blog-example-1.0.0.dmg
-rw-r--r--  1 akoskm  staff    89K Sep 25 08:27 electron-blog-example-1.0.0.dmg.blockmap
drwxr-xr-x  3 akoskm  staff    96B Sep 25 08:27 mac
You'll see many files in this folder, but there are two essential things here.
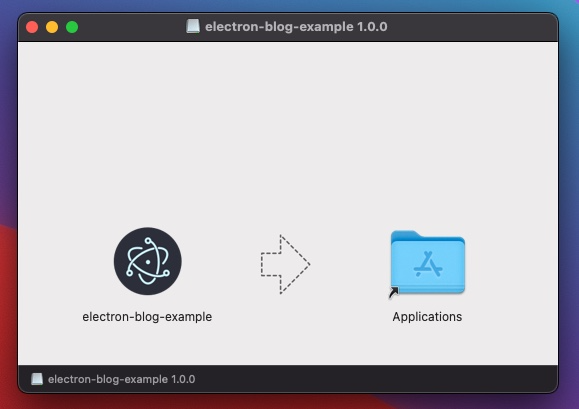
The first is the electron-blog-example-1.0.0.dmg file.
It is the installer of your app that, when you open it, you will see the familiar macOS install screen:

After dragging the app into Applications, your packaged app will appear in your macOS applications folder and the Launchpad.
Of course, it would not be delightful to reinstall the app every time you want to test its packaged version.
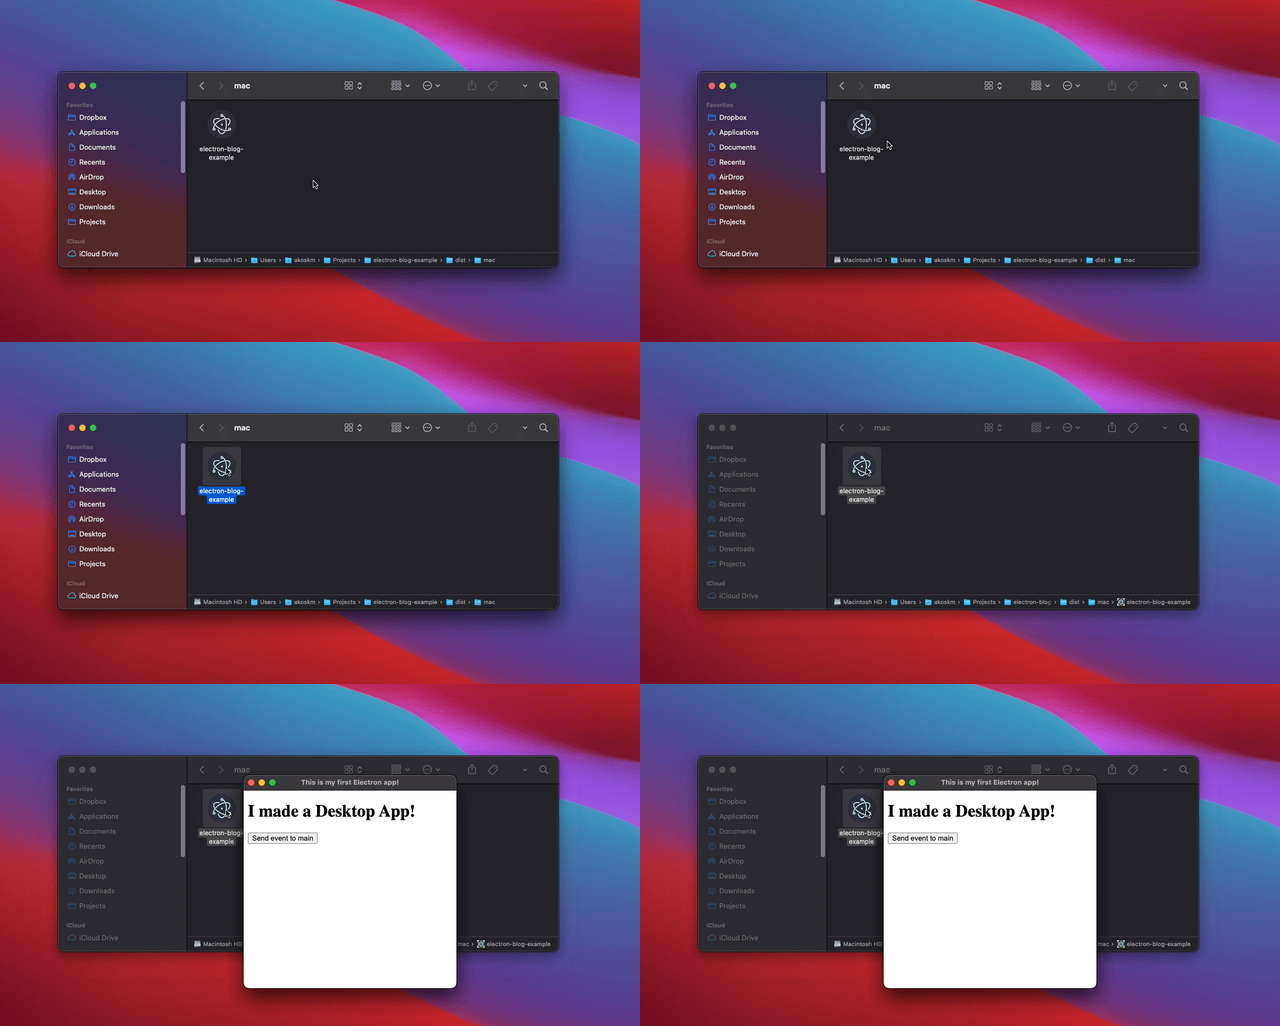
This is why electron-builder also created a macOS executable version of your app inside the mac folder - our second most important file.
You just double-click it, and it will run your application as it has already been installed:

Congratulations, you created a desktop installer and an executable for your JavaScript app!
