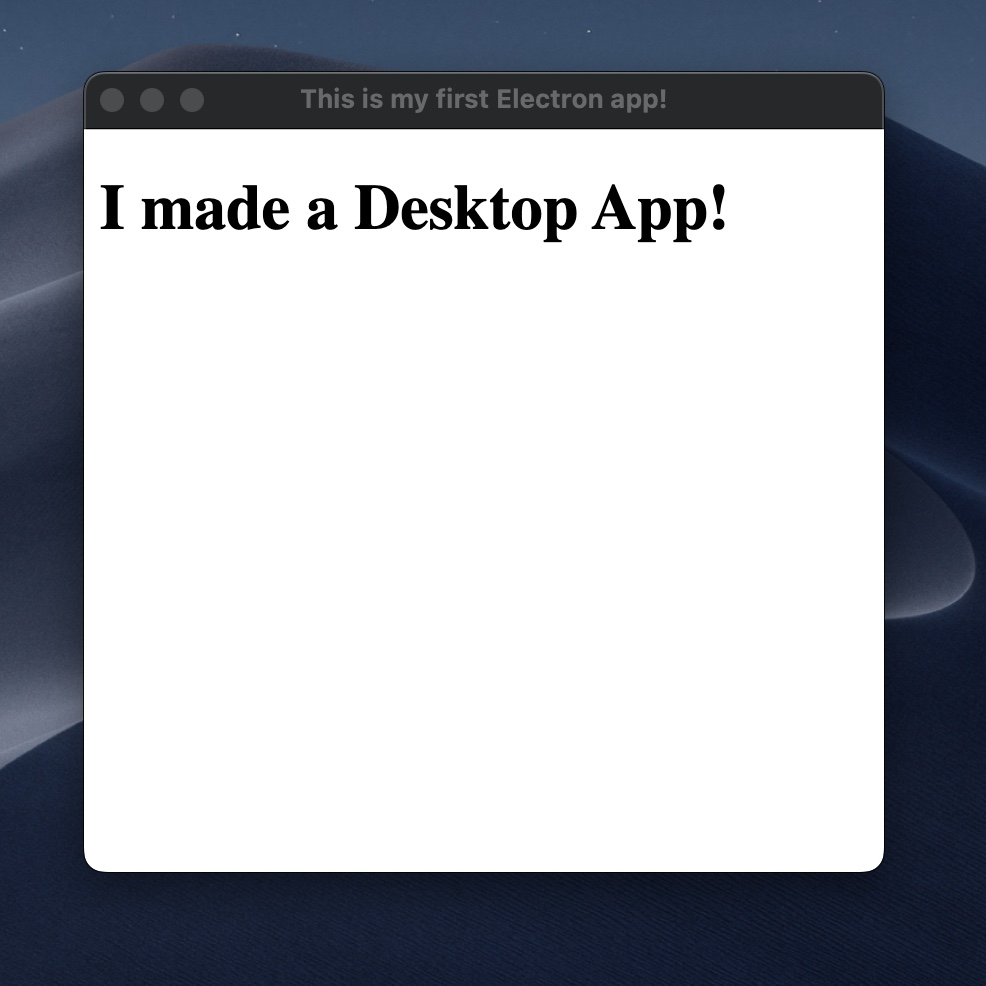
In this blog post, I'll show you how easy it is to build a JavaScript Desktop app with Electron. After about 13 lines of code, you'll have a fully functional Electron app!
I will walk you through the code and explain everything there is to know. 🤝
What is Electron
We're going to use the Electron framework to create this app. Electron is a free and open-source framework maintained mainly by GitHub.
It powers dozens of apps, that most of you already heard of: Discord, Slack, Notion, VSCode, Spotify, and many more.
The framework is designed to let developers create desktop applications using web technologies such as JavaScript, HTML, and CSS and run those applications inside a flavor of the Chromium browser engine while using NodeJS for the backend environment.
Electron exposes useful APIs such as the IPC (Inter-process communication module) that lets you to use the power of NodeJS from your Desktop app. Electron was originally built for Atom that's an IDE developed also by GitHub.
Structure of an Electron app
Here's the directory layout of a really simple electron application:
.
├── index.html
├── index.js
├── node_modules
├── package-lock.json
└── package.json

1 directory, 4 files
Let's kick off by making an npm project, adding some scripts, and installing electron.
For this purpose, let's create a simple package.json file with npm init.
Make sure you also install the only library we're going to use in this project, Electron:
npm i electron
The package.json file will look something like this:
{
  "name": "electron-blog-example",
  "version": "1.0.0",
  "description": "",
  "main": "index.js",
  "scripts": {
    "test": "echo \"Error: no test specified\" && exit 1"
  },
  "author": "",
  "license": "ISC",
  "dependencies": {
    "electron": "^20.0.2"
  }
}
Now run npm i to install all your dependencies.
Electron applications consist mainly of two things.
You can think of them as the front and the backend of an application.
Backend
In every electron app, you'll have an index.js file. This is the file you're actually going to run.
This file is responsible for creating your desktop application's main window and it's going to look like this:
const { app, BrowserWindow } = require("electron");

const createWindow = () => {
  const win = new BrowserWindow({
    width: 400,
    height: 400,
  });
  win.loadFile("./index.html");
};

app.whenReady().then(() => {
  createWindow();
});
Let's go over each of these lines.
const { app, BrowserWindow } = require("electron");
This is where you import the two most important things you need from Electron:
- app; controls your application lifecycle
- BrowserWindow; a class that you can use to create a new browser window
Let's use BrowserWindow to create an actual browser window:
const createWindow = () => {
  const win = new BrowserWindow({
    width: 400,
    height: 400,
  });
  win.loadFile("./index.html");
};
createWindow function does two things:
- it specifies some properties for the browser window, such as width and height
- it loads a file called
index.html
This is pretty much equivalent to opening a web page index.html in your browser.
However, createWindow should not be called until Electron is fully initialized. We can be sure that it's fully initialized when whenReady is called. This function returns a Promise so you can chain it with then and have something like this:
app.whenReady().then(() => {
  createWindow();
});
Front end
Similar to the index.js file, there's an index.html file that contains the UI of your application.
Let's create an index.html file with some simple content:
<!DOCTYPE html>
<html>
  <head>
    <title>This is my first Electron app!</title>
    <meta http-equiv="Content-Security-Policy" content="default-src 'self'; script-src 'self'">
  </head>
  <body>
    <h1>I made a Desktop App!</h1>
  </body>
</html>
So far we have a JavaScript file that creates a BrowserWindow and a simple HTML file that's displayed when Electron becomes ready.
Running your first Electron app
But how do we run this thing?
Add "start": "electron .", to "scripts":
{
  "name": "electron-blog-example",
  "version": "1.0.0",
  "description": "",
  "main": "index.js",
  "scripts": {
    "start": "electron .", // this is new
    "test": "echo \"Error: no test specified\" && exit 1"
  },
  "author": "",
  "license": "ISC",
  "dependencies": {
    "electron": "^20.0.2"
  }
}
Finally, all you have to do is to run the following command:
npm start
and your first Electron app will start up in a few seconds:

Congratulations! You just built your first desktop application with JavaScript!
In the next tutorial, we're going to explore some of the electron APIs, such as ipcMain and ipcRenderer.
