
Hi friends! The following article is a guest post from Genesis (Nifty) on creating and sending Resend email templates using Astro. Hope you’ll like it!
Hello Friends of Ákos,
It’s an honor to get an opportunity to share my knowledge with all of you. Since I’m a guest, I decided to cover something in Astro. You know, a framework most of us are familiar with. If you're struggling with creating email templates in your Astro projects, this article is for you.
If you’re unfamiliar with Resend, it’s an email API for developers. You can use it with a bunch of programming languages and frameworks. Some include Node.js, Python, PHP, and a lot more. Y’all didn’t really think I was gonna list them all here, did you? Nah, instead, here’s a link to the Resend Docs. Skim them, read them, and refer to them.
Anyways, so how do we actually do this?
Astro Project Setup
We can start by creating the Astro project:
npm create astro@latest email-templates-astro
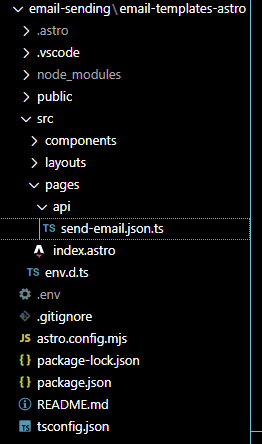
It will prompt you to choose how you would like to start your new project, with TypeScript or without. Choose how strict you want TypeScript, and install dependencies. Also, you can initialize a new git repository. This is how I chose to set up my Astro project:
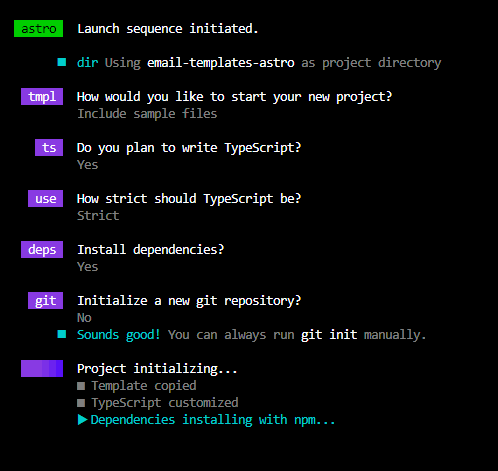
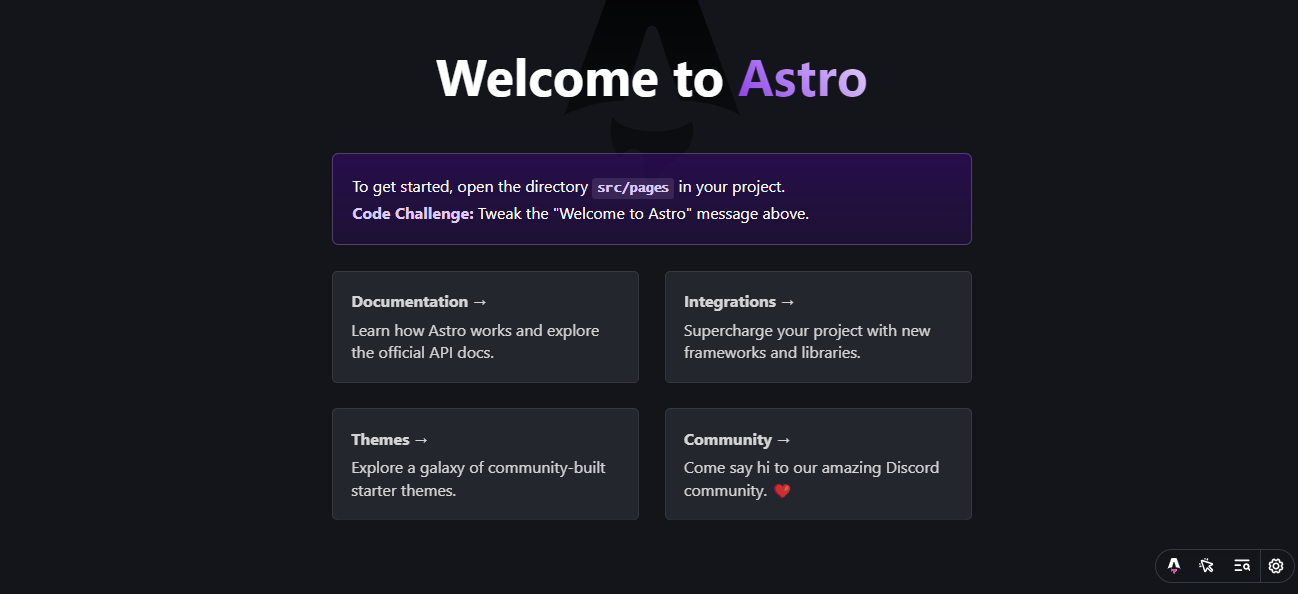
Start the dev server with npm run dev, go to http://localhost:4321/, and you will see your project. Try making changes to your src/pages/index.astro file and see them reflect.
Resend API Setup
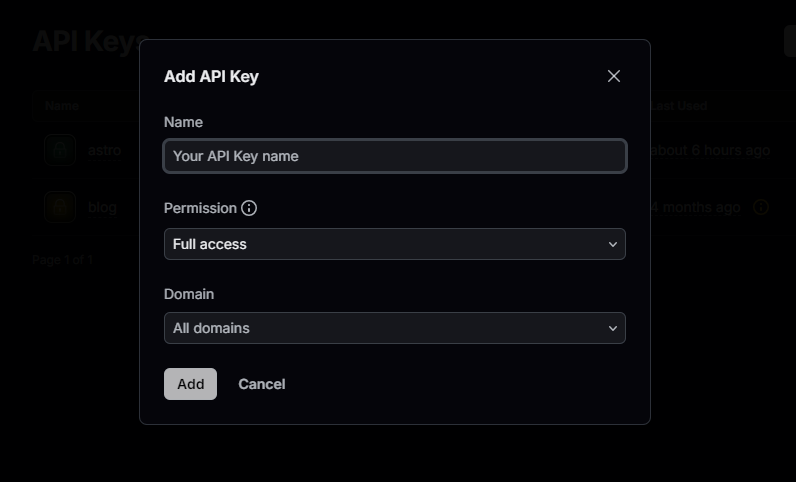
To create a Resend API Key, make a Resend account and go to API Keys in the sidebar. Press the “Create API Key” button. A modal should appear, prompting you to name the API key, choose permissions (full access or just sending access), and a domain (the default is all domains).
As soon as you have a Resend API Key, create an .env file in your project and add the API Key:
RESEND_API_KEY="Your_Resend_API_Key"
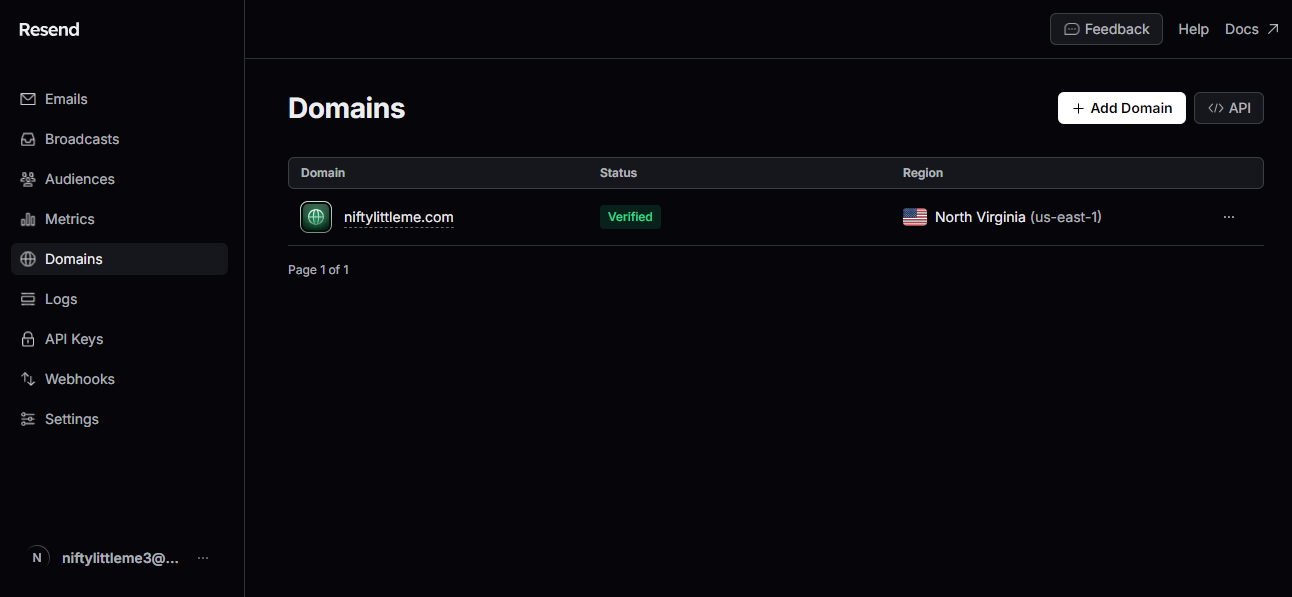
Connect your website’s domain. In order to send emails to others from your chosen email address, you would need to connect your website’s domain:
Once you have the Resend Node.Js SDK…
npm install resend
Creating The Form
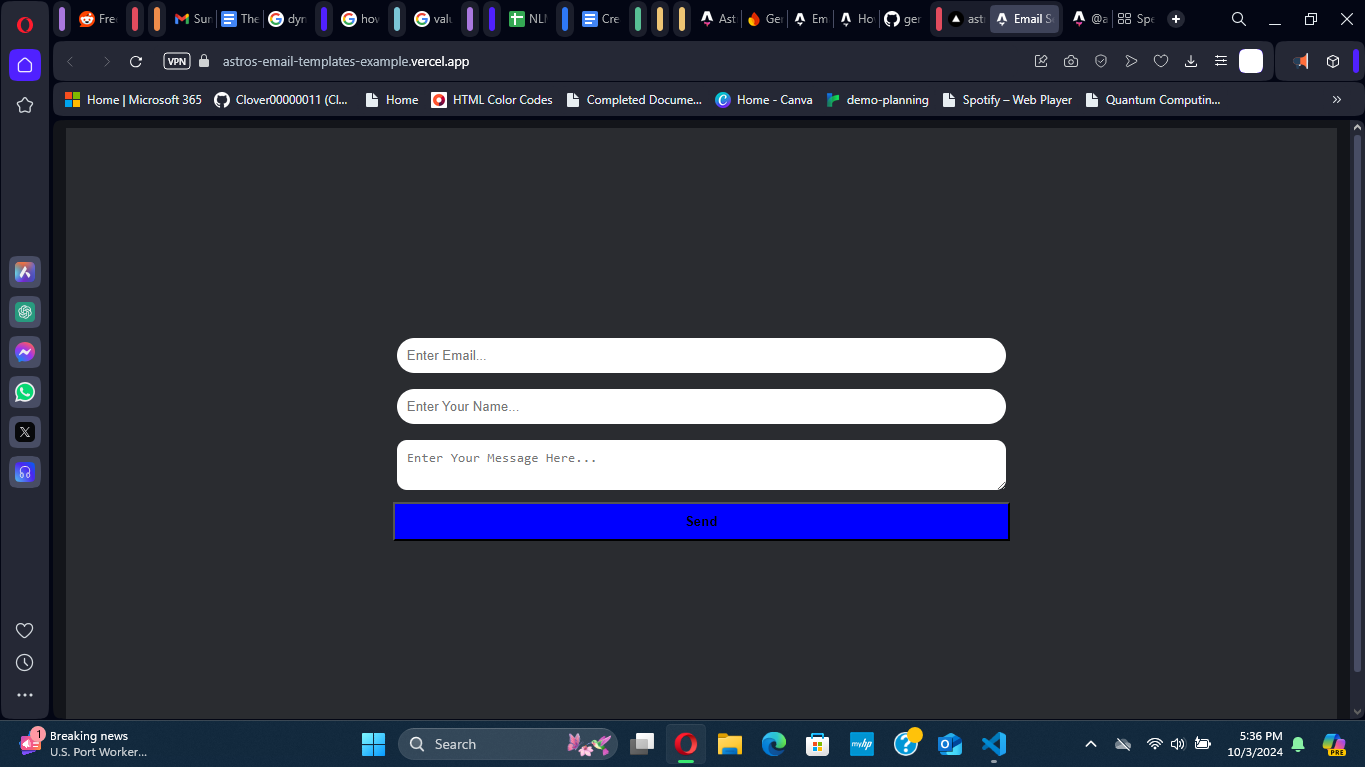
…we need a form, obviously. In this case, let’s have three fields: email, first name, and the message. We should also include a send button. Here you go:
<form method="POST" action="/api/send-email.json" enctype="application/x-www-form-urlencoded">
  <input type="email" name="email" id="email" placeholder="Enter Email..." required>
  <input type="text" name="firstName" id="firstName" placeholder="Enter Your Name..." required>
  <textarea name="message" id="message" placeholder="Enter Your Message Here..." required />
  <button type="submit">Send</button>
</form>
Creating The Email Templates
Also, we want to send two emails. One to the user for confirmation, and one to you because you’re who the message is for. So, create two components in your project. Here’s the basic version of both; however, I urge you to customize this code to better serve you:
AdminEmailTemplate.astro:
---
interface Props {
  firstName: string;
  message: string;
}

const { firstName, message } = Astro.props;

---

<div>
  <h1>New Message From { firstName }</h1>
  <p>They sent... <span>{message}</span></p>
</div>
UserEmailTemplate.astro:
---
interface Props {
  firstName: string;
  message: string;
}

const { firstName, message } = Astro.props;

---

<div>
  <h1>Welcome, { firstName }</h1>
  <p>You sent... <span>{message}</span></p>
</div>
Creating The API Endpoint (Sending The Emails)
You will need to create an api directory in your pages folder. Inside, create a send-email.json.ts file.
Inside this file, we will get the formData and render the templates with Astro’s Container API. It allows you to take an Astro component, render it, and return a string or a response. In this case, we want a string representing the content rendered by the Astro component.
export const prerender = false; //This will not work without this line and has to be here for server-side rendering

//Imports
import type { APIRoute } from "astro";
import { experimental_AstroContainer } from 'astro/container';
import { Resend } from "resend";
import UserEmailTemplate from "../../components/UserEmailTemplate.astro";
import AdminEmailTemplate from "../../components/AdminEmailTemplate.astro";

//Get Resend API key from environment variables
const resend = new Resend(import.meta.env.RESEND_API_KEY);

export const POST: APIRoute = async ({ request }) => {
  const container = await experimental_AstroContainer.create(); //Creating Container

  //Fetching formData
  const data = await request.formData();
  const name = data.get("firstName") as string;
  const email = data.get("email") as string;
  const message = data.get("message") as string;

  //Checking all fields
  if (!name || !email || !message) {
    return new Response(
      JSON.stringify({
        message: `Fill out all fields.`,
      }),
      {
        status: 404,
        statusText: "Did not provide the right data",
      },
    );
  }

  //Rendering the templates
  const emailAdminHtml = await container.renderToString(AdminEmailTemplate, {
    props: { firstName: name, message },
  });

  const emailUserHtml = await container.renderToString(UserEmailTemplate, {
    props: { firstName: name, message },
  });
Send two emails using Resend. Make sure the email address domain you're sending from for the user’s email is the same domain you verified to be yours in Resend.
We’ll use resend.emails.send() and add the email data as the parameters (from, to, subject, html, etc). And then we will check if we were successful at sending the email or not.
//Sending the emails
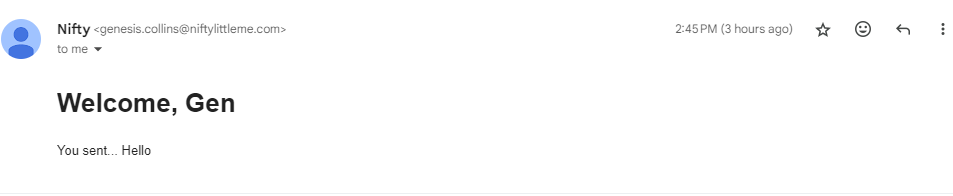
const sendUserResend = await resend.emails.send({
from: "Your Name <your-email make sure your email has your domain>",
to: `${email}`,
subject: `Hi ${name}`,
html: emailUserHtml,
})
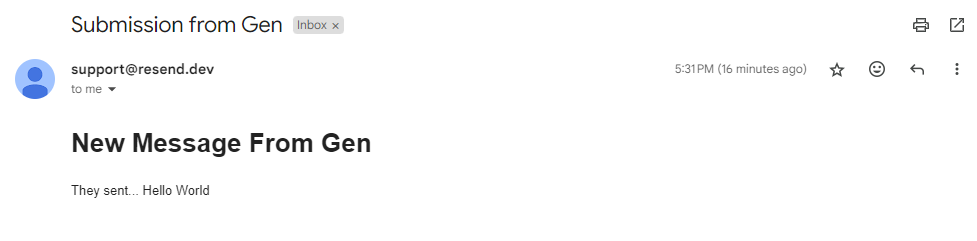
const sendAdminEmail = await resend.emails.send({
from: "support@resend.dev",
to: `<your-email>`,
subject: `Submission from ${name}`,
html: emailAdminHtml,
});
//Checking for success or failure
if (sendUserResend.data && sendAdminEmail) {
return new Response(
JSON.stringify({
message: `Messages successfully sent!`,
}),
{
status: 200,
statusText: "OK",
},
)
} else {
return new Response(
JSON.stringify({
message: `Messages failed to send: User- ${JSON.stringify(sendUserResend.error)} Admin-${JSON.stringify(sendAdminEmail.error)} `,
}),
{
status: 500,
statusText: `Internal Server Error: User- ${JSON.stringify(sendUserResend.error)} Admin-${JSON.stringify(sendAdminEmail.error)} `,
},
);
}
};
Results
And that’s all. It should work like a charm.
Here, I put together a basic example for you folks on GitHub:
Happy Coding!
Nifty from Nifty Little Me Blog - niftylittleme.com