
Authentication is no joke. When I first encountered the magic-link sign-in platforms, they blew me away with their simplicity and convenience.
Let me explain.
Most of you are already signed in to your email clients. Your email is probably tied to your bank account, GitHub, and hundreds of other services, so you keep it super secure. You probably have a johndoe user registered somewhere with the password helloworld, but I bet it's not your email account.
So your mailbox is secure by default, accessible, and uniquely identifies you.
Login forms already require an email. Most even use an email + password combination for authentication, so in theory, you always have the user's email.
Maybe we don't need anything more?
Enter magic-links!
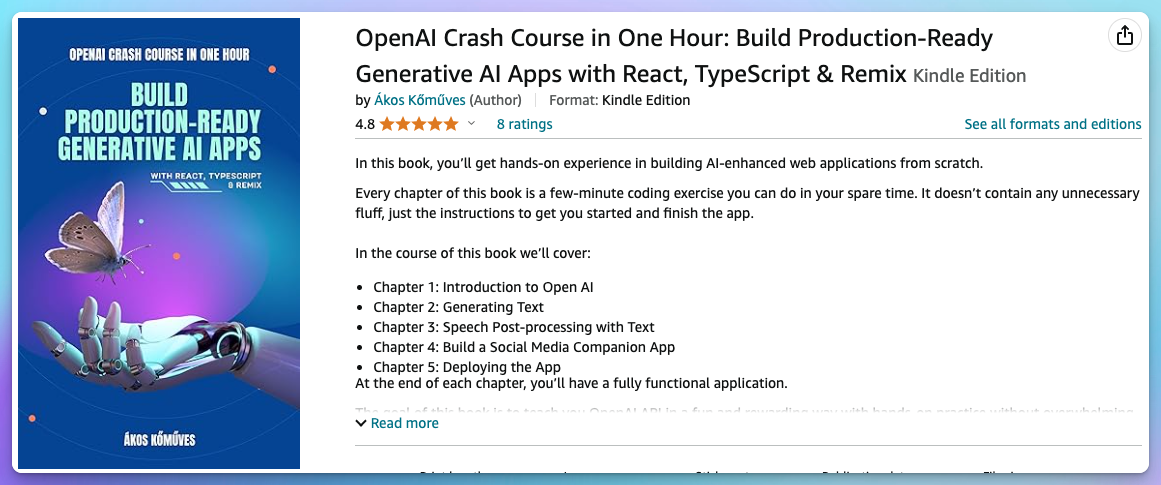
🌟 Supabase makes it super easy to implement magic links, but the fun doesn't end here. Check out my book to learn through practice how you build a Supabase-backed PWA, from scratch: https://a.co/d/dWzDolV
It allows users to log in by clicking a unique link sent to their email, eliminating the need for passwords. The unique link is like a temporary password. When clicked, the backend verifies the link's authenticity and generates a user session, and voila, you're logged in.
I hope you're excited to build such a system yourself. I almost feel bad for talking so long about the awesomeness of the magic-link idea.
It's time to get our hands dirty!
Tech Stack and Requirements
For this project, we'll use Next.js, Supabase, and SendGrid. To make SendGrid sending effective, you'll need an email address to verify it as a Single Sender, but don't worry—I'll walk you through that step-by-step!
Every tool and tier we use in the project is free, and with this guide, you can get into production for $0 in just a few minutes. If you have questions, comment or contact me directly at support@akoskm.com.
Setup
Next.js
Our framework of choice for this project, but note that the general approach of implementing magic-link sign-ins would be the same for Remix, but your actions and SSR components would have a bit different syntax.
If you're also interested in a Remix version, comment, and I'll create one!
If you want to check out the basics of Remix, I have another post that might interest you:
To create a Next.js project from scratch, run this in your terminal:
$ npx create-next-app@latest magic-link-demo
Leave everything at the default setting:
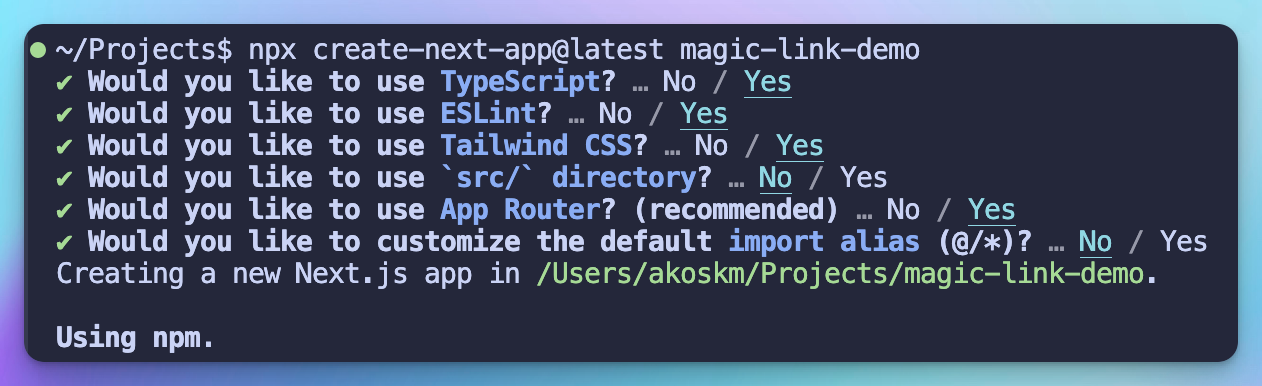
Once this is done, switch to the generated directory cd magic-link-demo and if you're using VSCode, you can reopen the fresh project inside the current editor with this command code . -r.
Go ahead and create an .env file because in the next step we'll already put some values in there.
Supabase
Supabase is a Firebase alternative. It provides a set of APIs that let you access a PostgreSQL database, Auth functionalities, and more.
To get started, head over to supabase.com and create a new project.
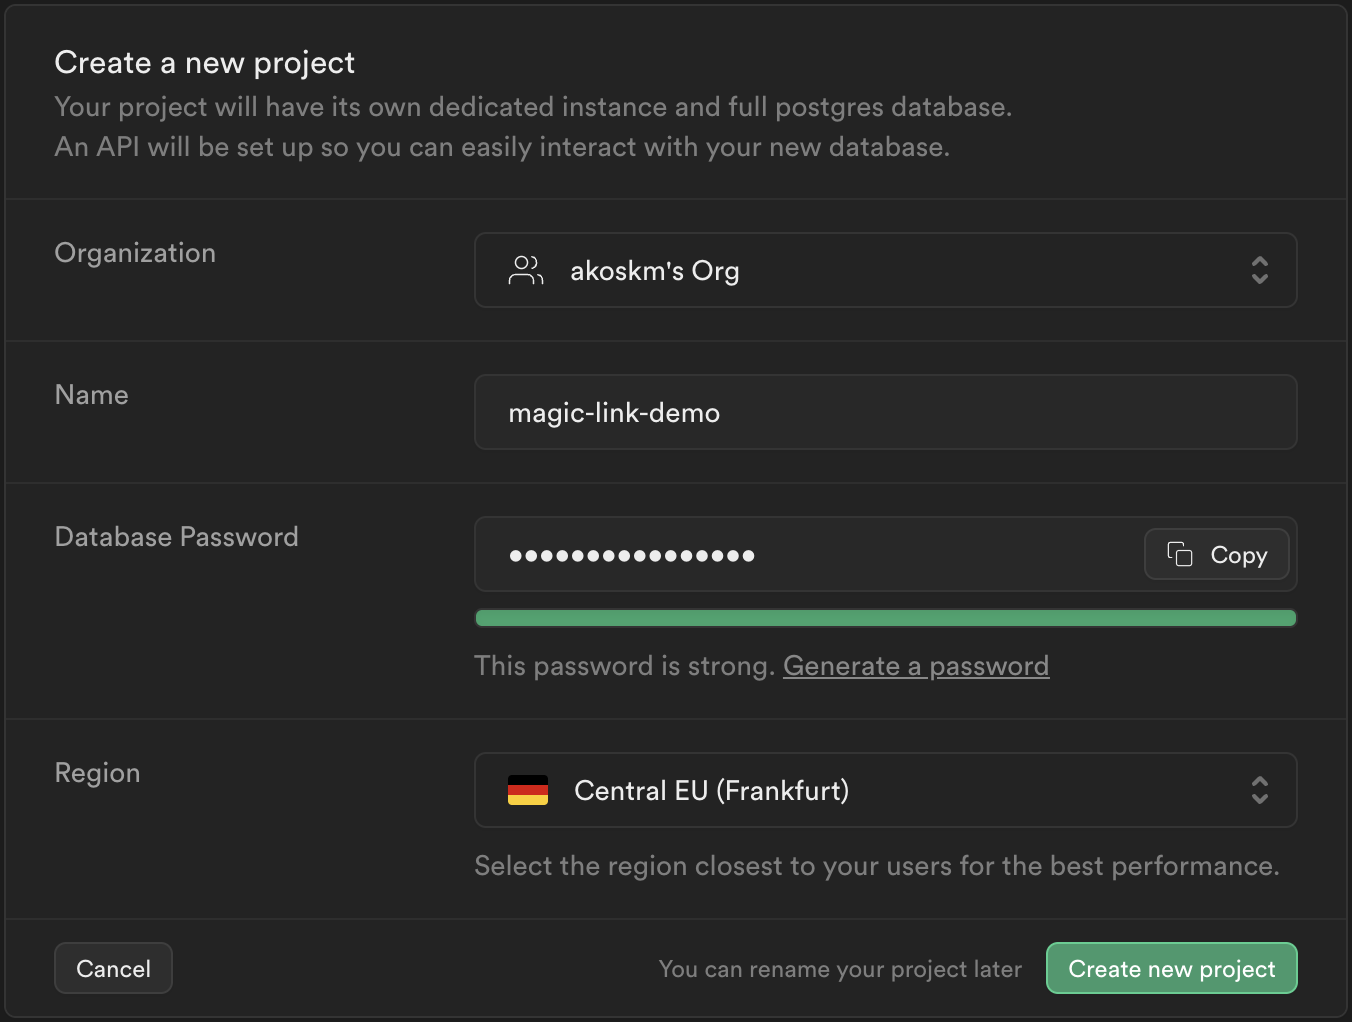
Once your project is created, scroll down to the Connecting to your new project section:
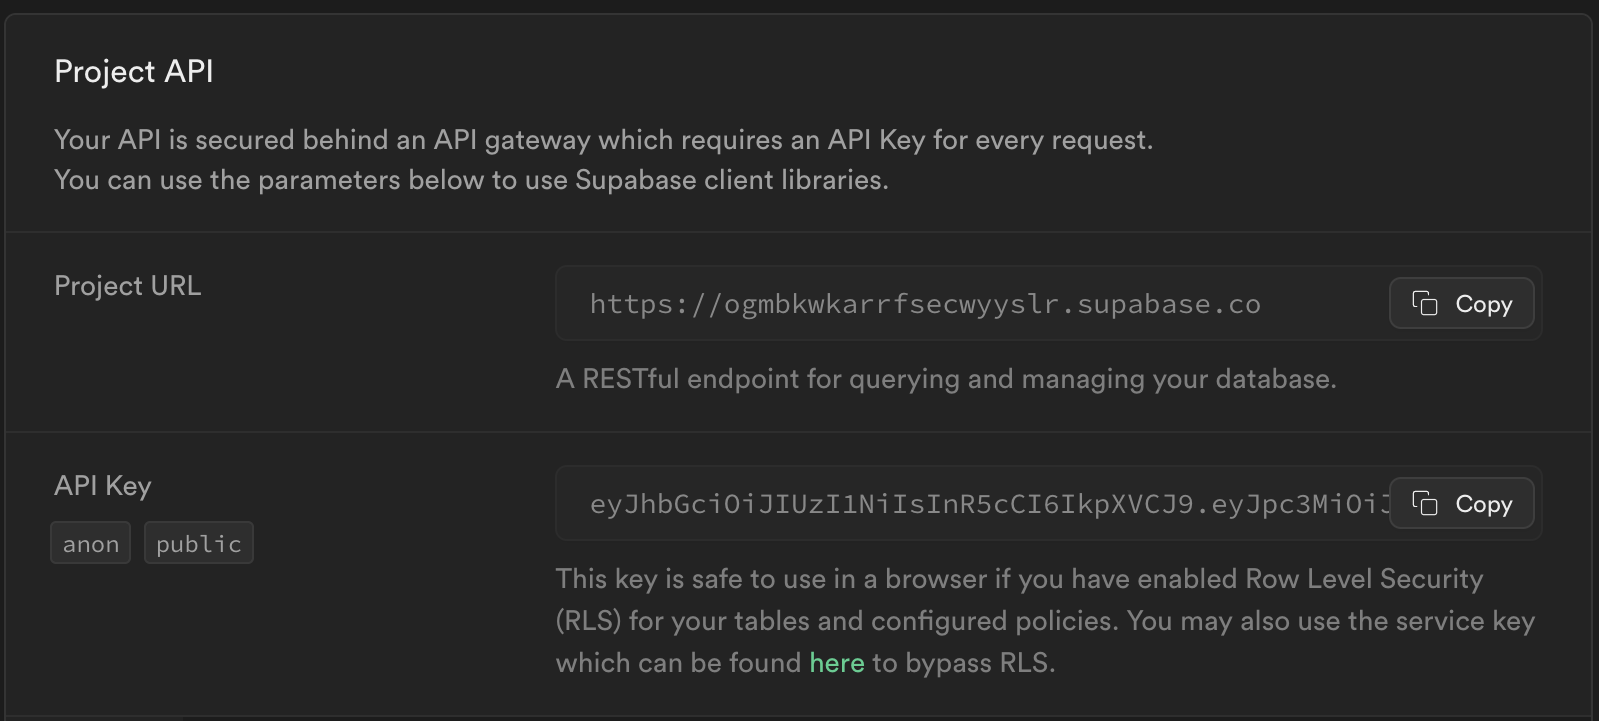
Then copy and paste these two values into your .env file:
# .env
NEXT_PUBLIC_SUPABASE_URL=<your_supabase_project_url>
NEXT_PUBLIC_SUPABASE_ANON_KEY=<your_supabase_anon_key>
Next, in the sidebar, select Settings > Configuration > Authentication, then scroll down to SMTP Settings and turn on Enable Custom SMTP:
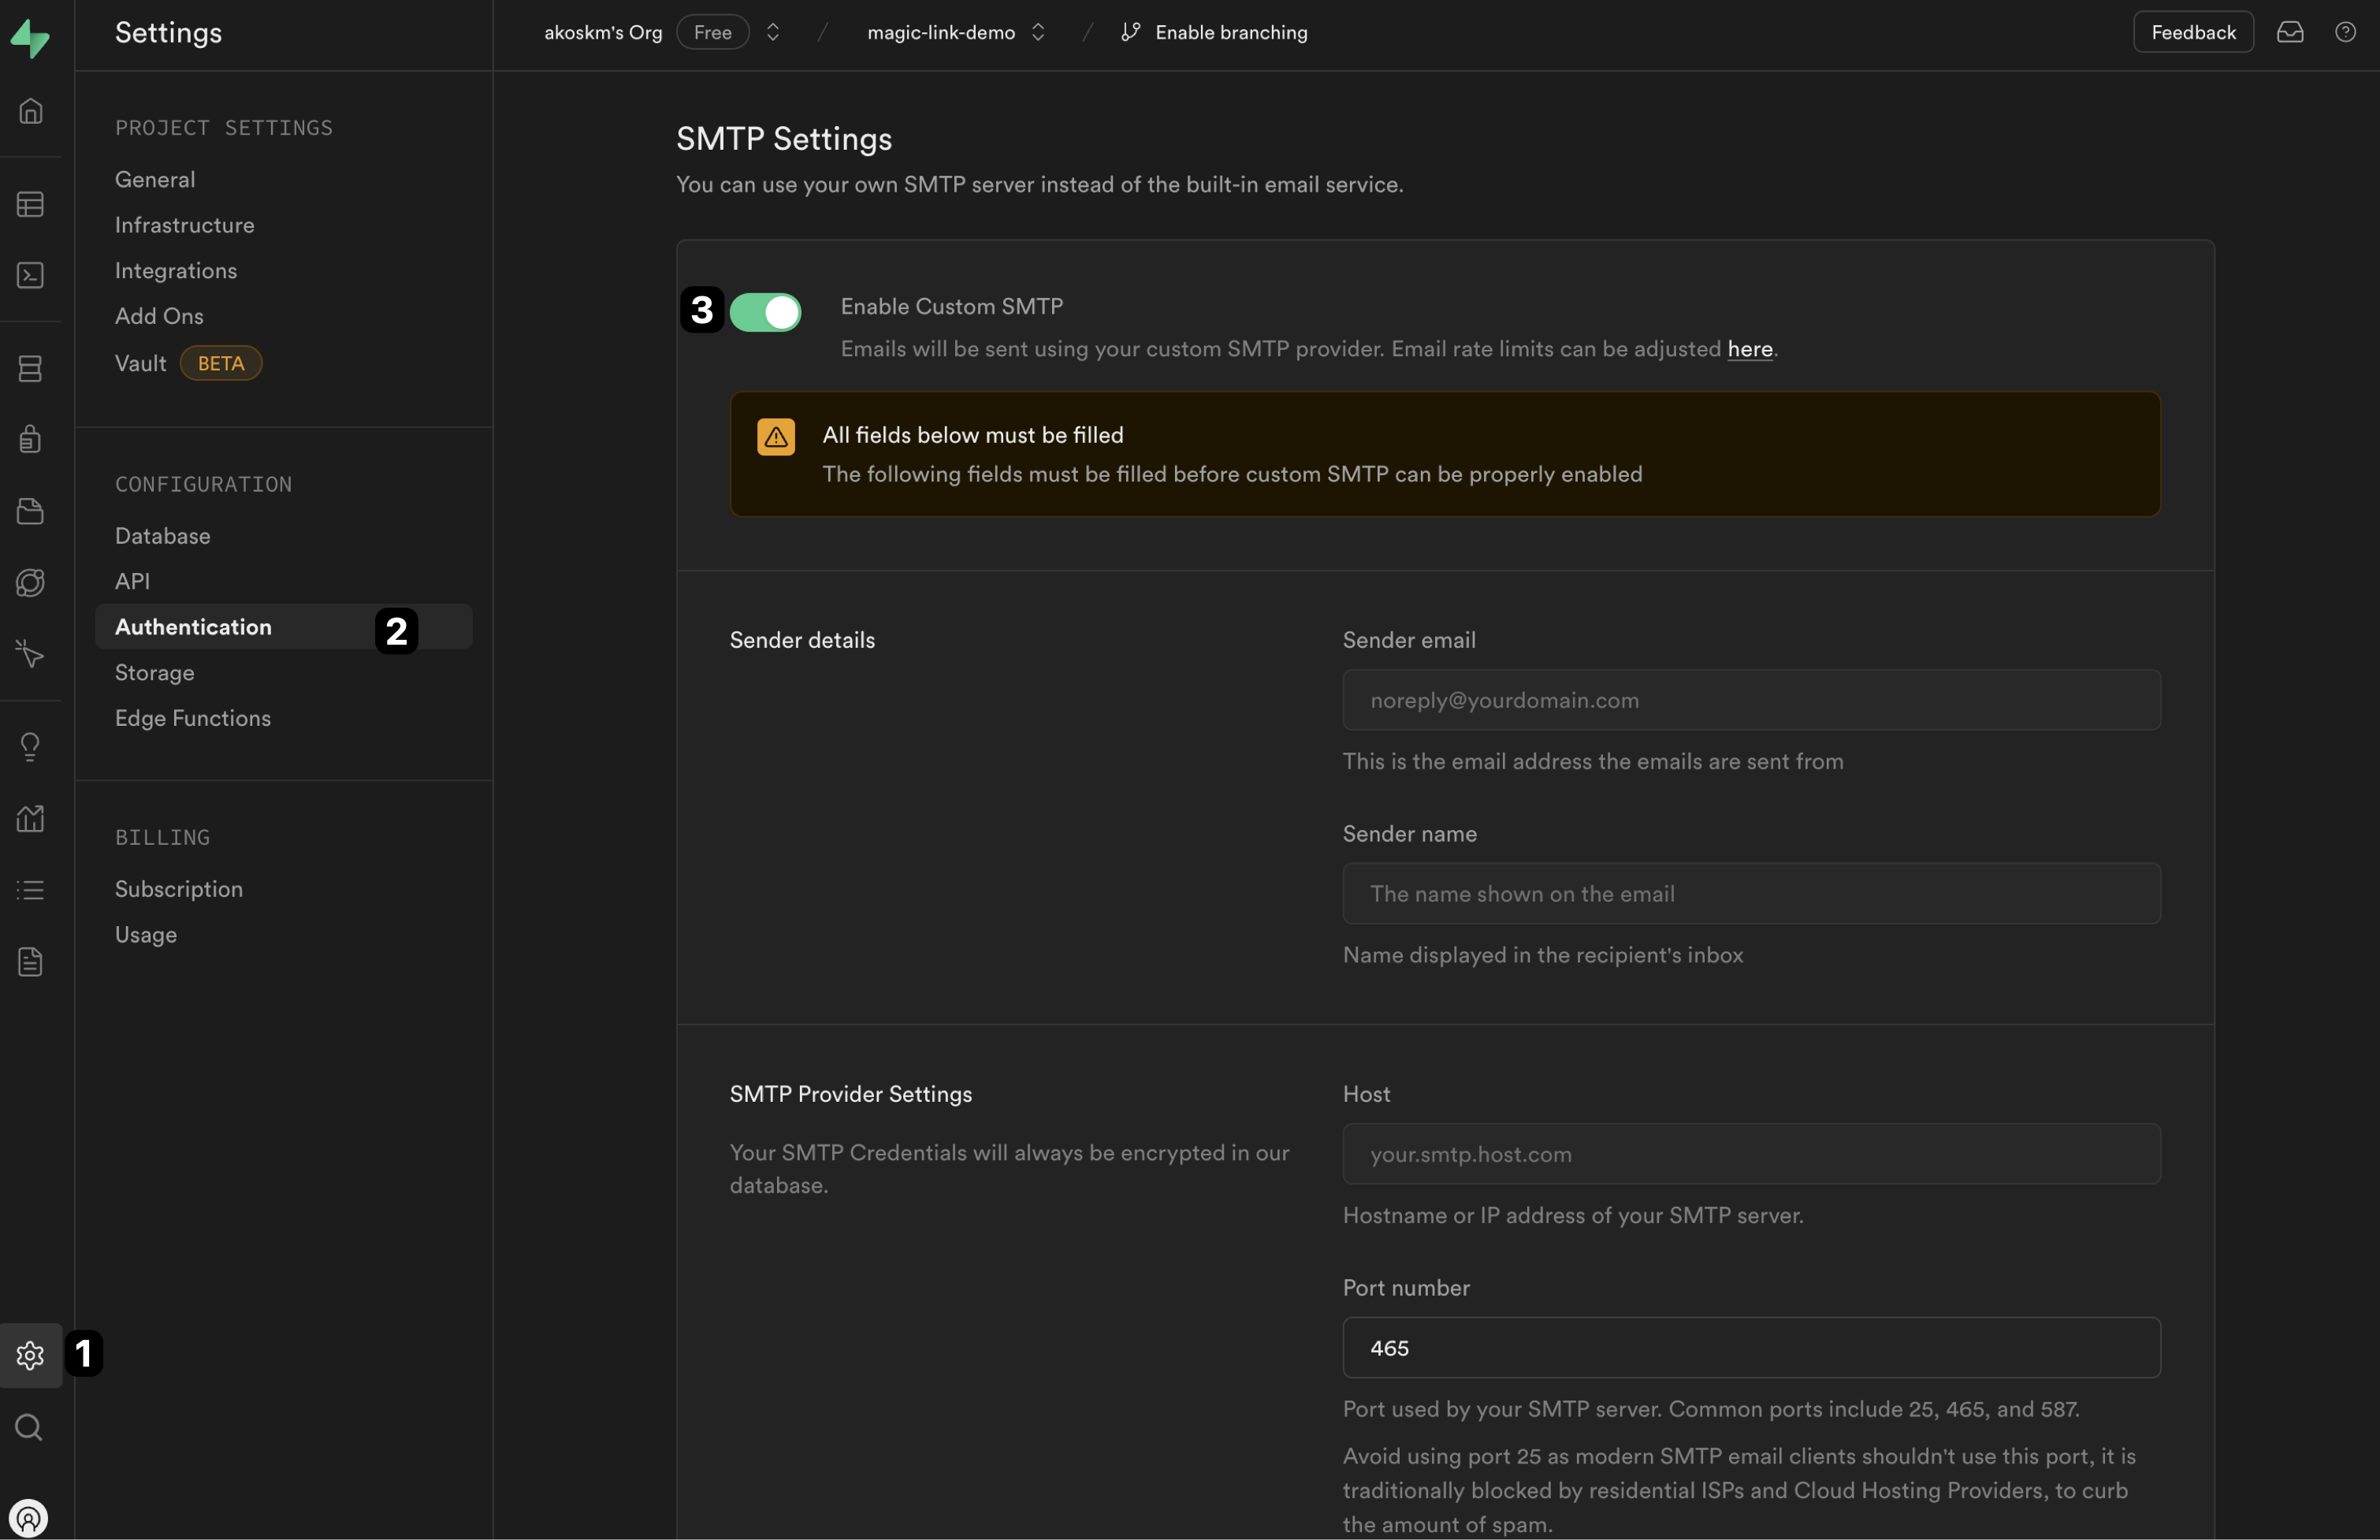
This is very important to configure because Supabase can send up to 3 emails per hour, which you'll quickly run out of if you're just testing a new application.
Let's go to Sendgrid and obtain our SMTP settings.
Sendgrid
SendGrid is a transactional email service that's super easy to use. Head over to sendgrid.com.
Setting up a Single Sender
Expand the sidebar, and under Settings, select Sender Authentication. Follow the steps to configure a Single Sender.
You'll use this sender later in Supabase as a Sender email.
Setting up an API key
Also, in the sidebar, under Settings, select API keys, then Create API key:
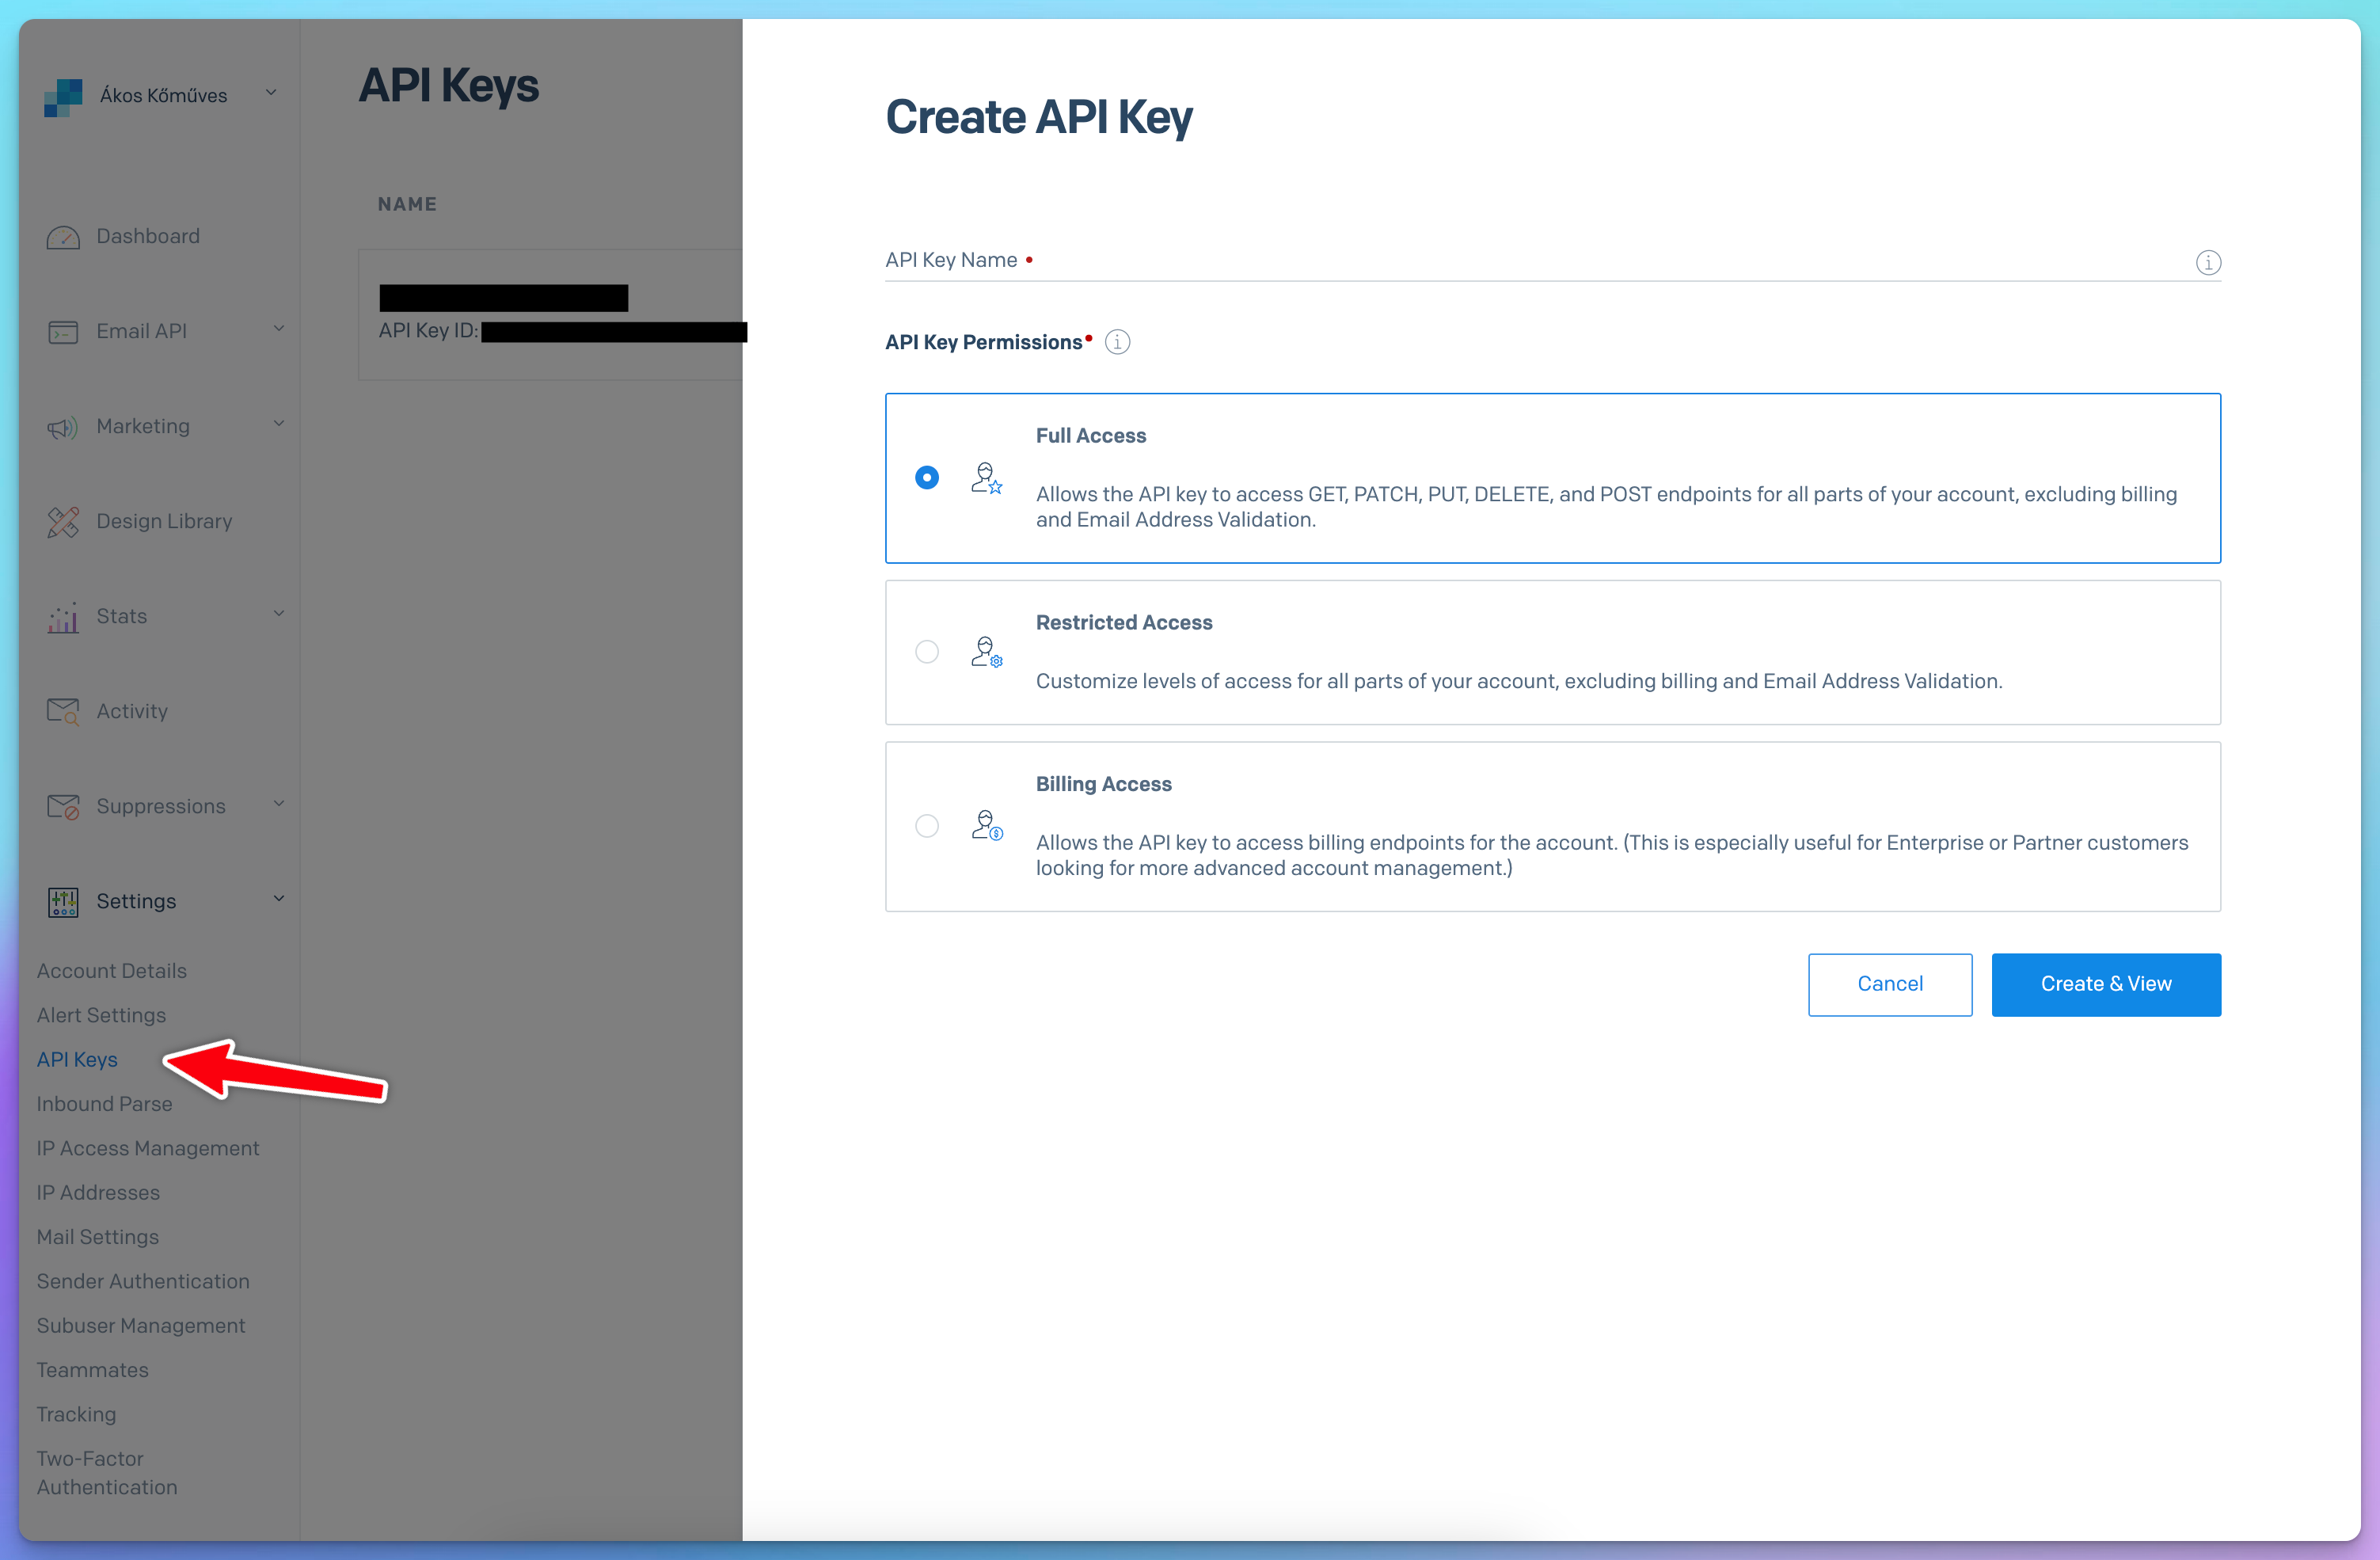
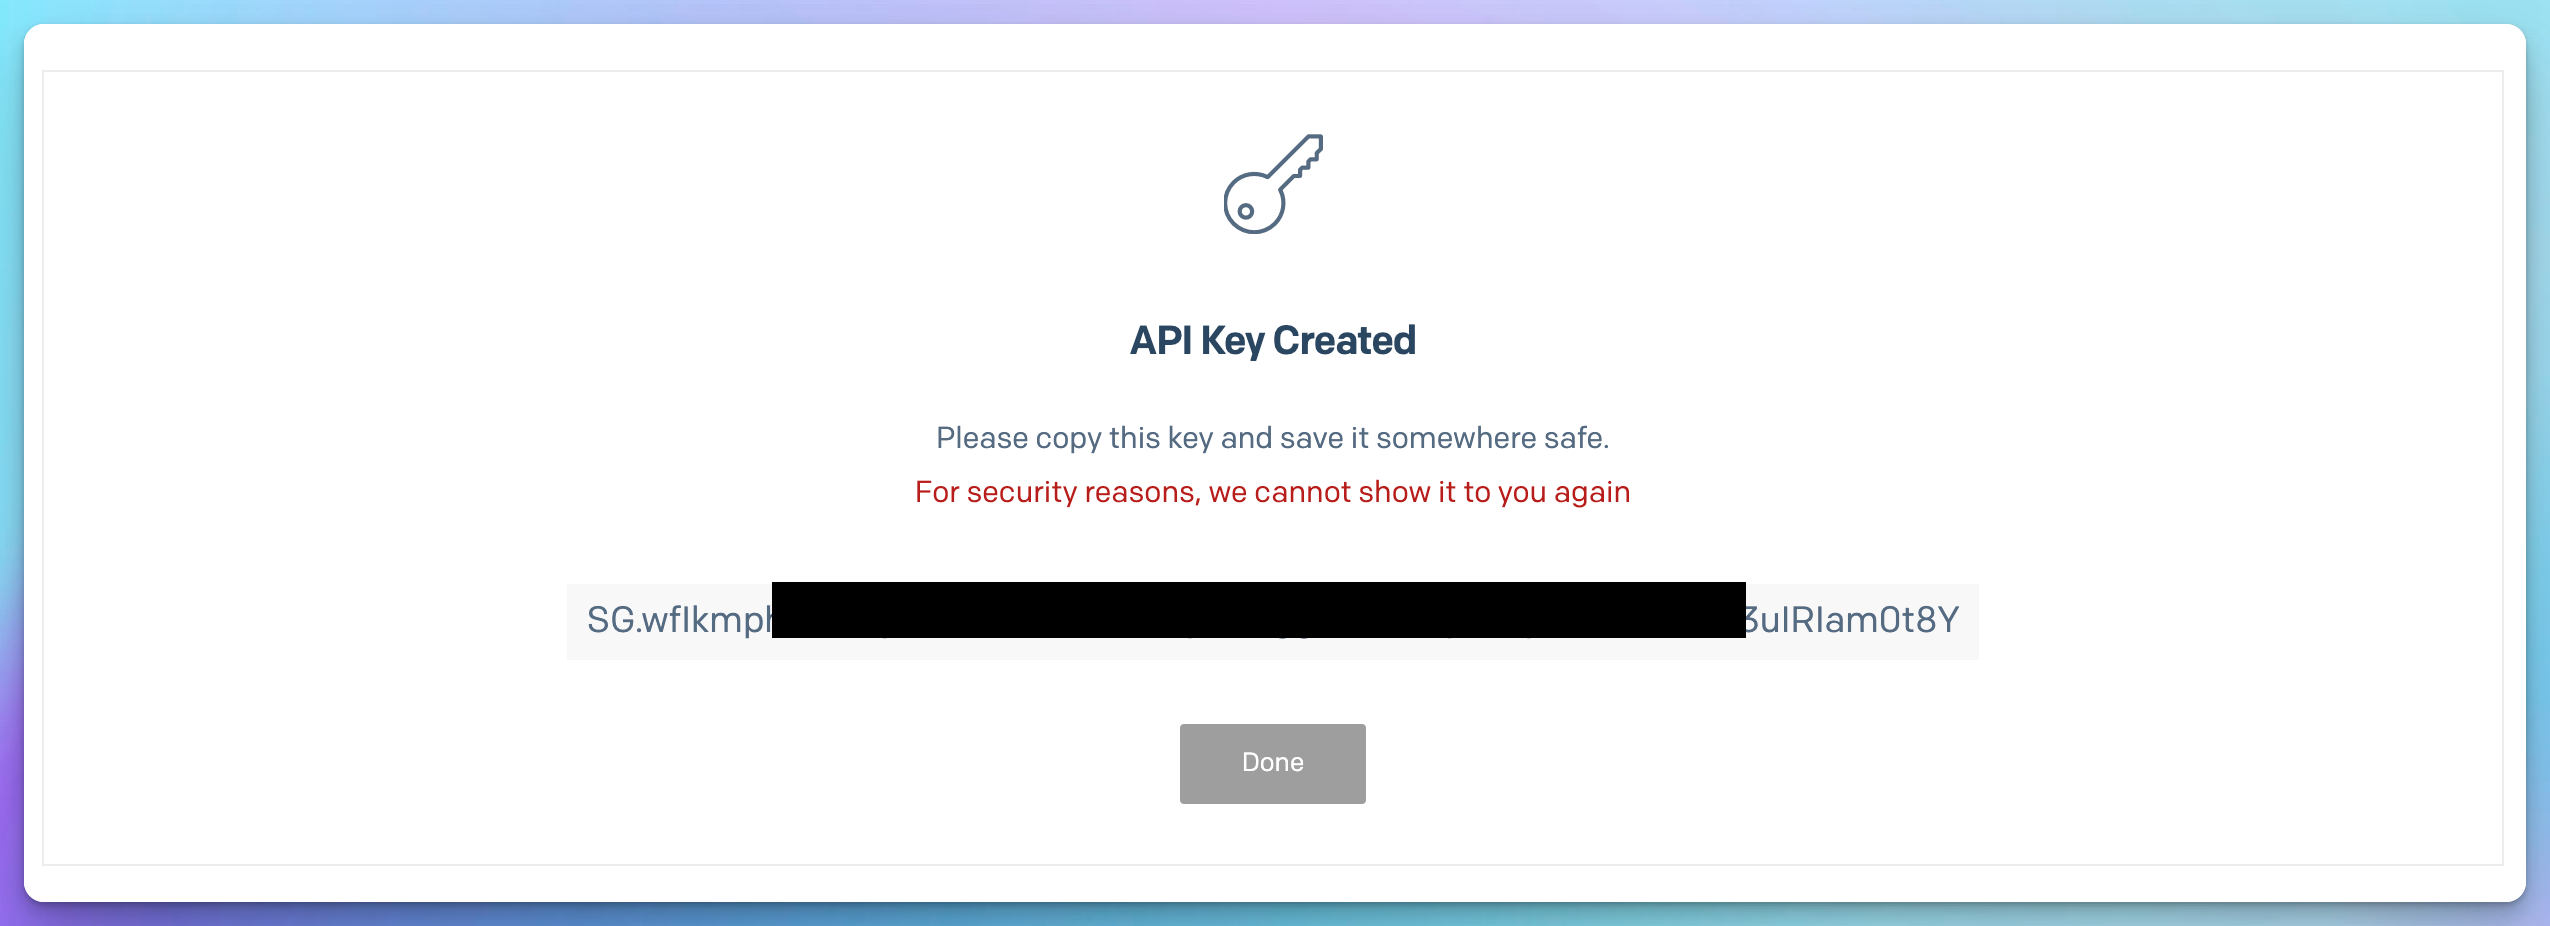
Click Create & View and copy the generated key.
Configuring SMTP in Supabase
Head back to Supabase and paste it under SMTP Provider Settings into the Password field. The Username will be apikey, and the Host should be set to smtp.sendgrid.net. Set the Port number to 587.
This page should contain the up-to-date documentation for using Sendgrid SMPT with your API key.
For the Sender details, use the same email you used to configure the Single Sender identity.
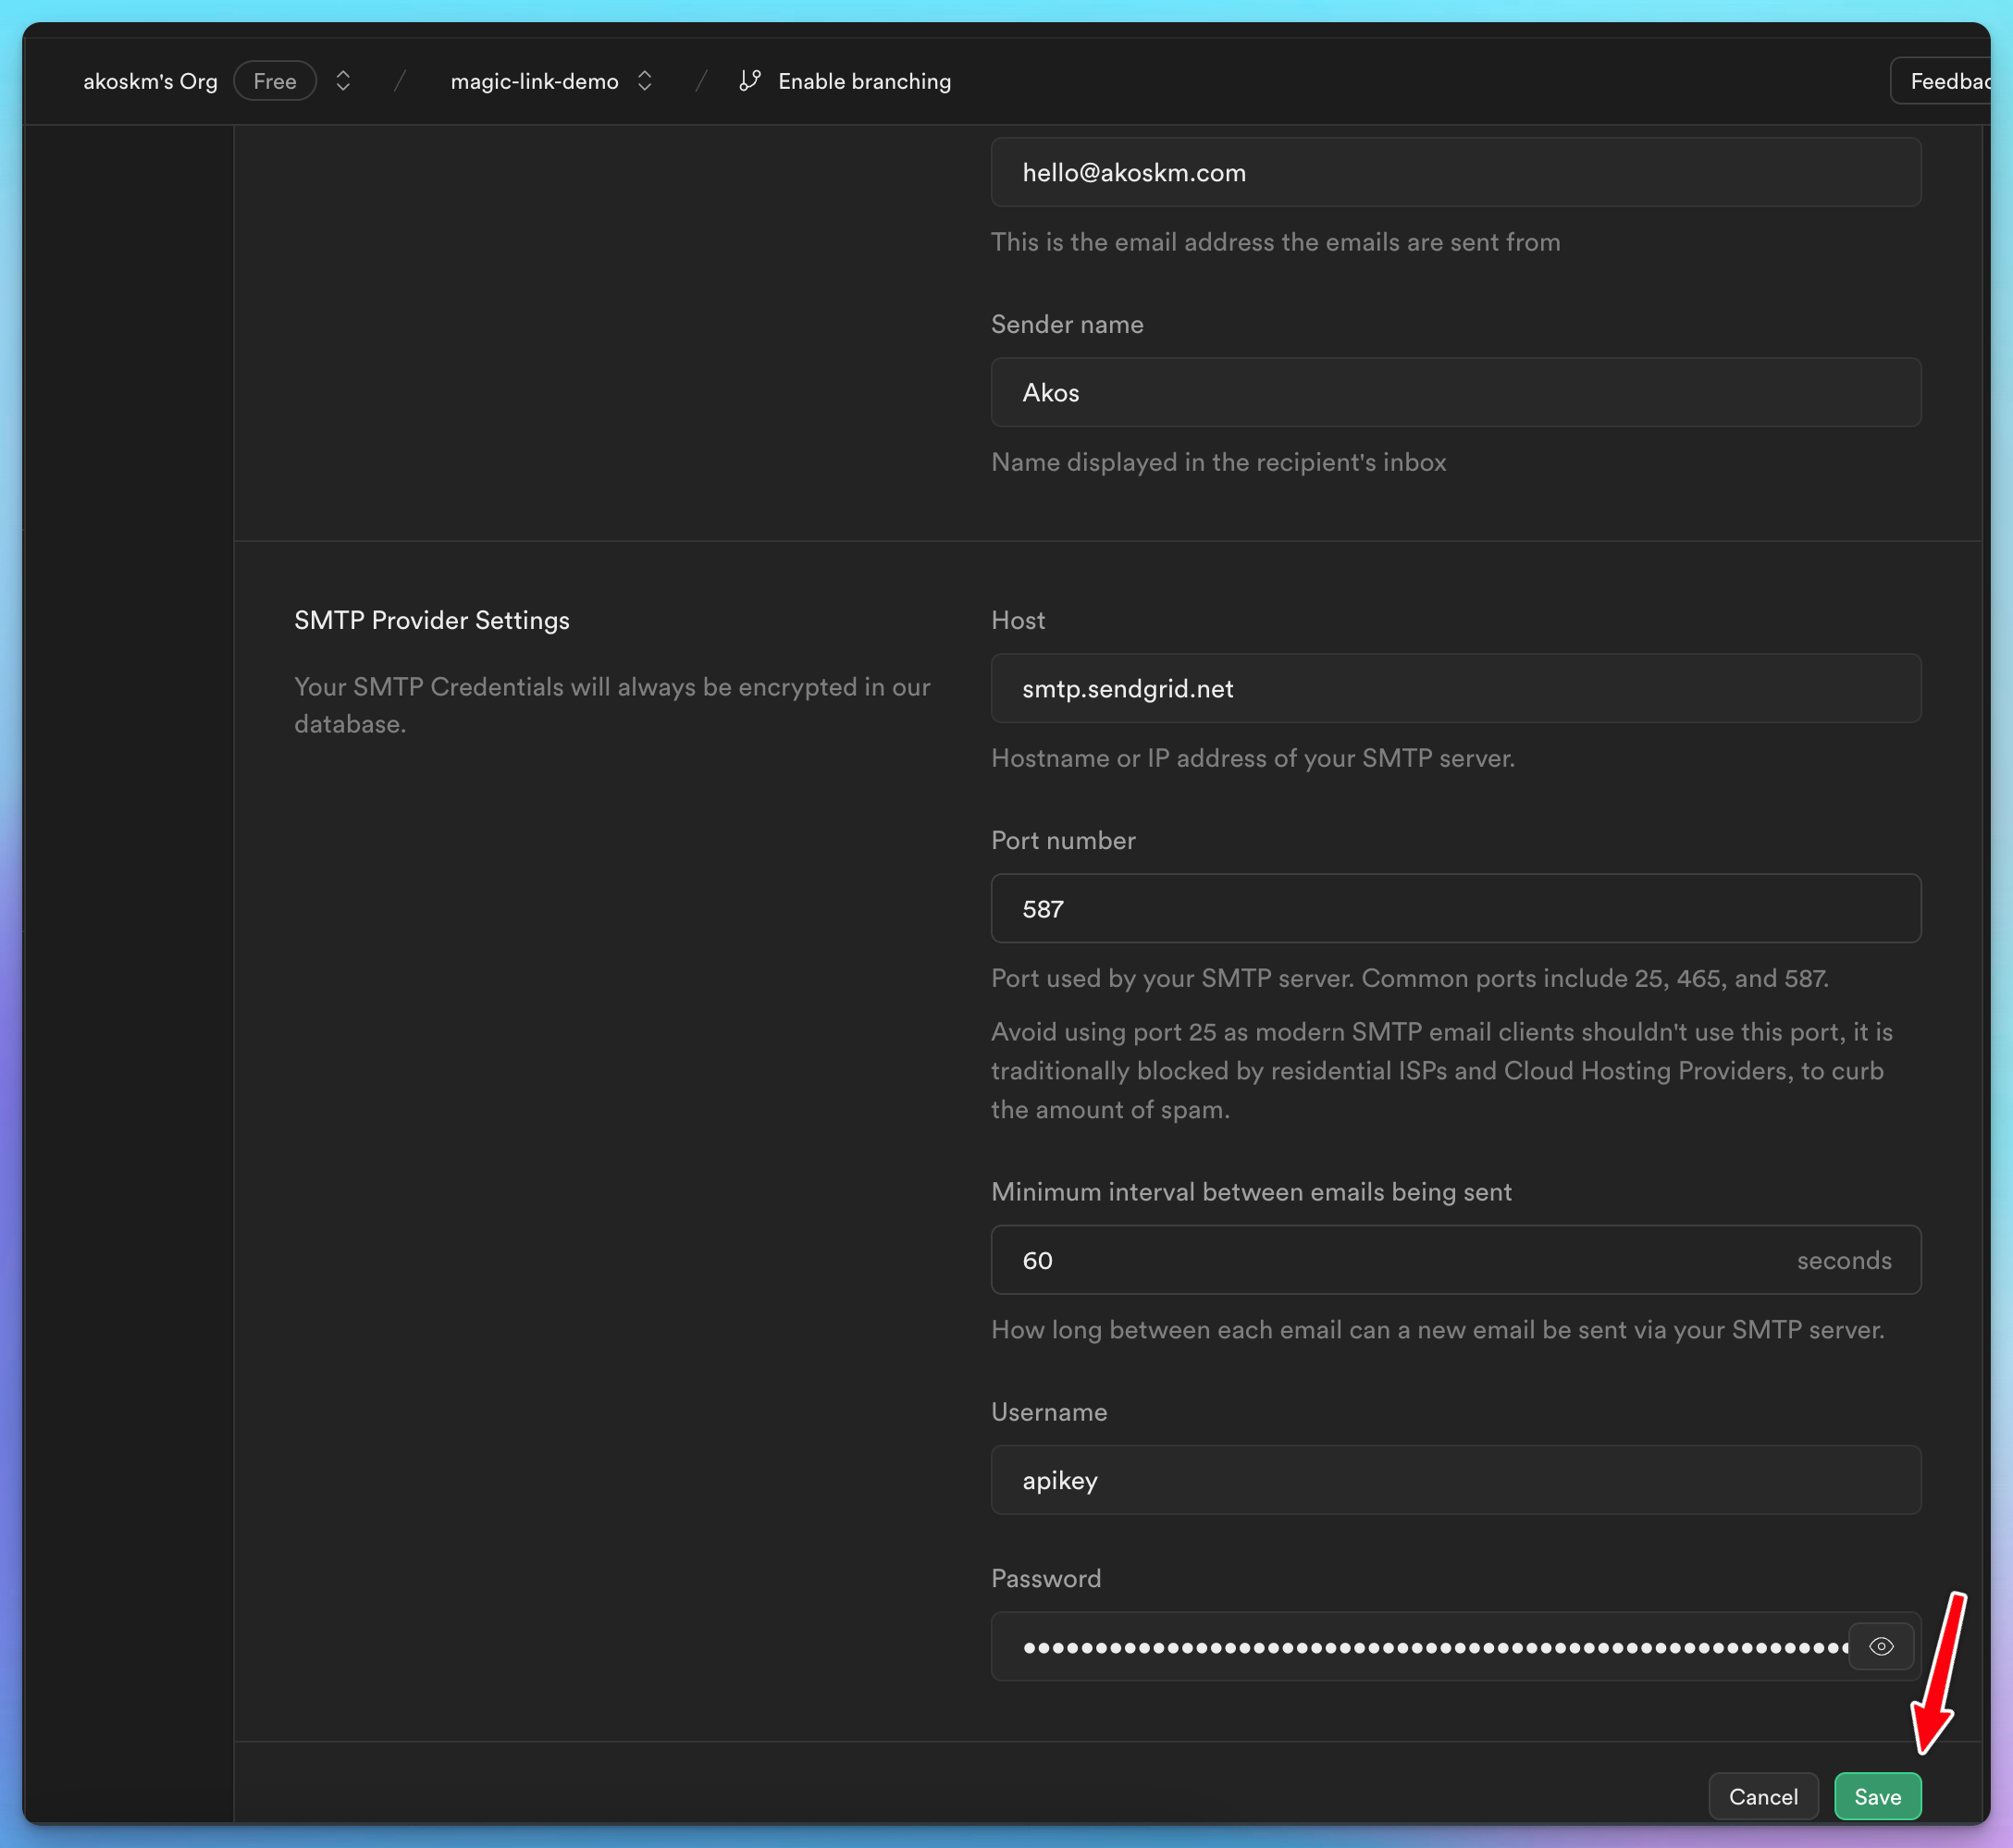
Once configured, click Save.
Updating the Auth confirmation path
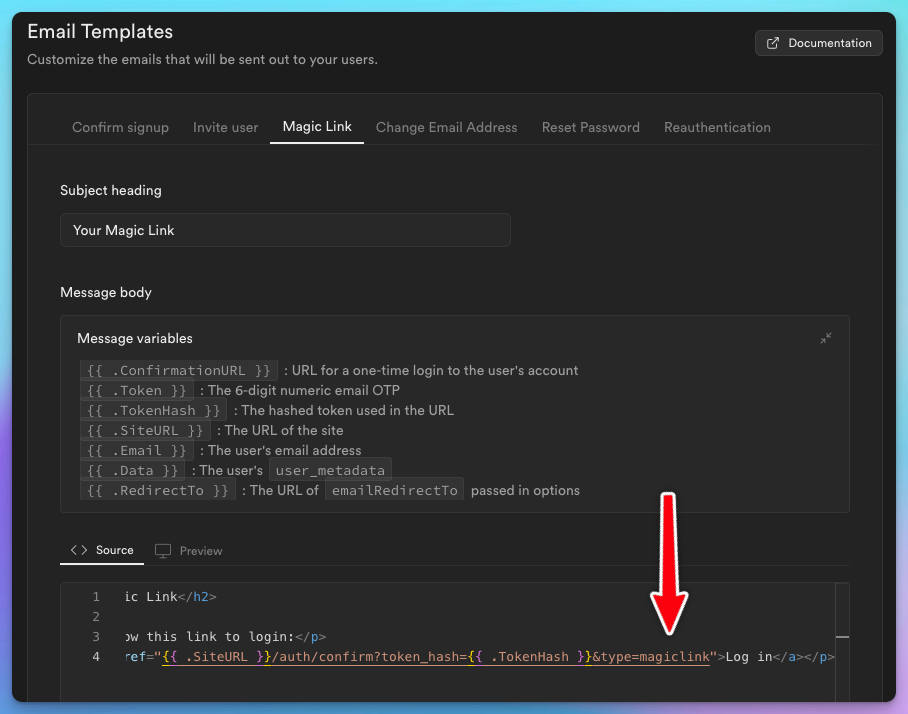
One last thing you have to do in Supabase is to change the Confirm signup email template from {{ .ConfirmationURL }} to {{ .SiteURL }}/auth/confirm?token_hash={{ .TokenHash }}&type=signup as described here.
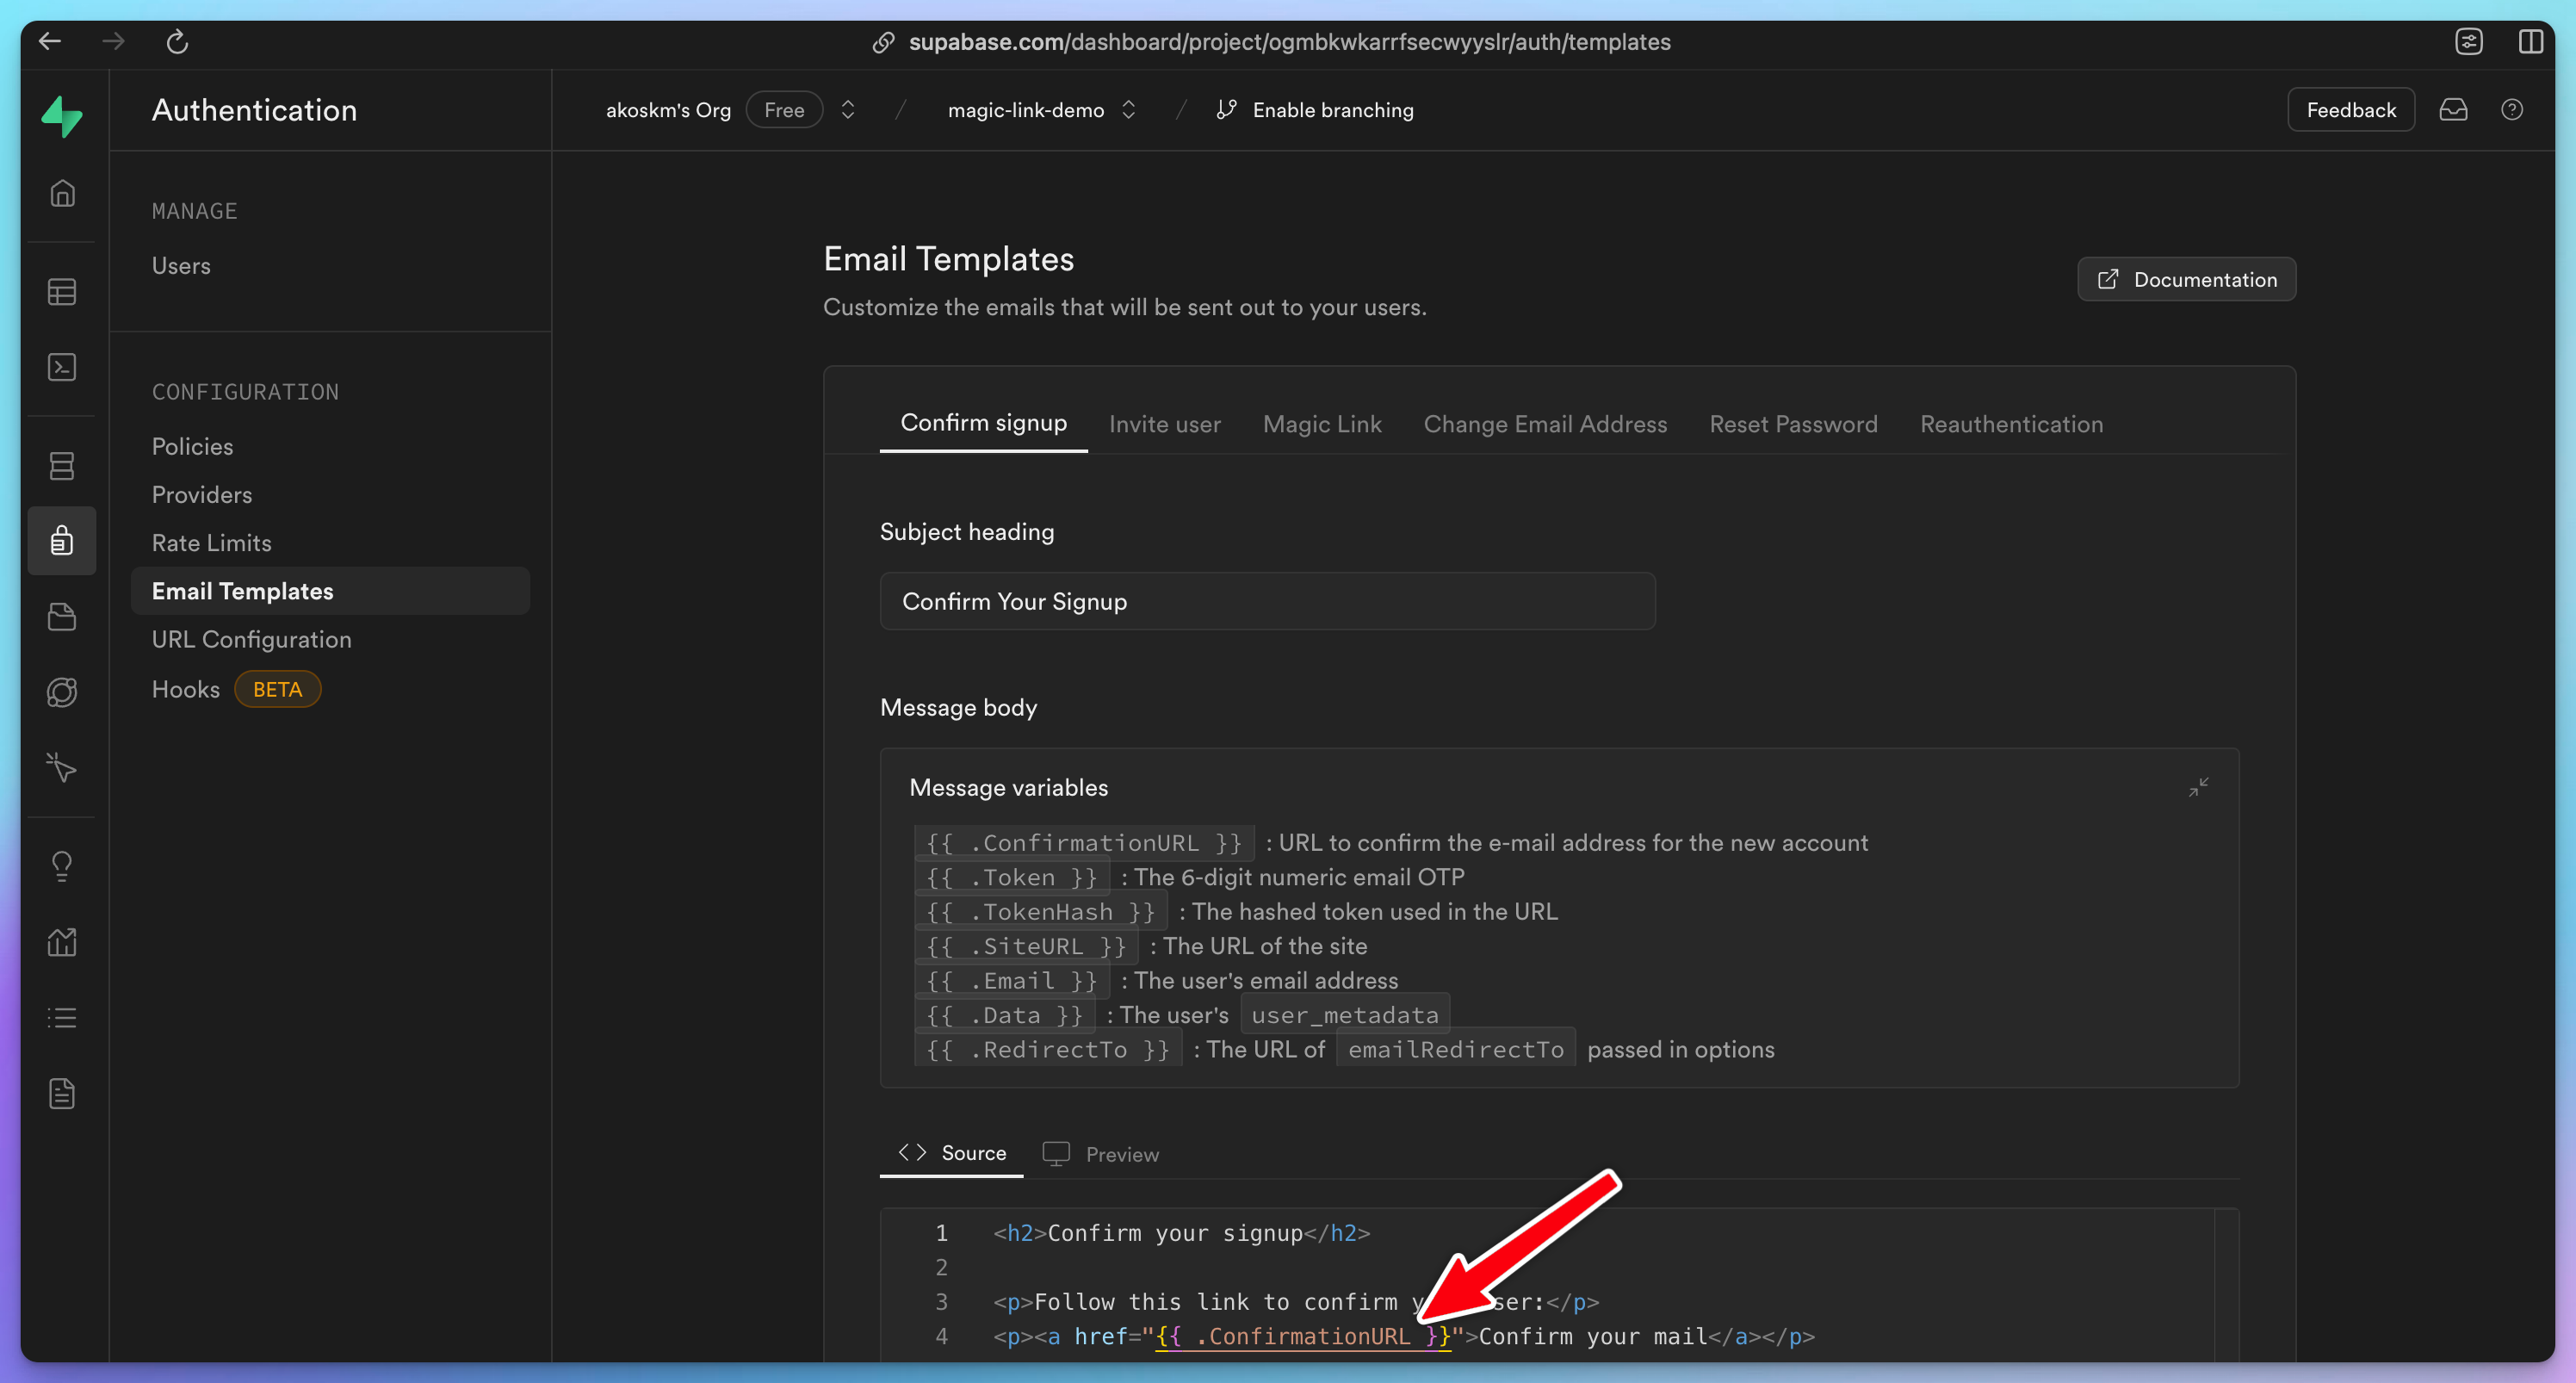
Do the same thing in the Magic Link tab, but this time, set type to magiclink:
Let's return to our Next.js project and add a simple Sign-in screen.
daisyUI
For the UI, we'll use daisyUI, so install it first:
npm i -D daisyui@latest
and also add the daisyUI plugin to your tailwind config file as described in the docs:
module.exports = {
  //...
  plugins: [
    require('daisyui'),
  ],
}
Magic-link sign-in
Page
Once this is done, create a new file in app/login/page.tsx:
export default async function Login() {
  return (
    <main className="flex min-h-screen flex-col items-center p-24">
      <form className="flex flex-col gap-4 prose">
        <h1>Log in</h1>
        <label className="input input-bordered flex items-center gap-2">
          Email
          <input
            name="email"
            type="text"
            className="grow"
            placeholder="daisy@site.com"
          />
        </label>
        <button className="btn btn-primary">Submit</button>
      </form>
    </main>
  );
}
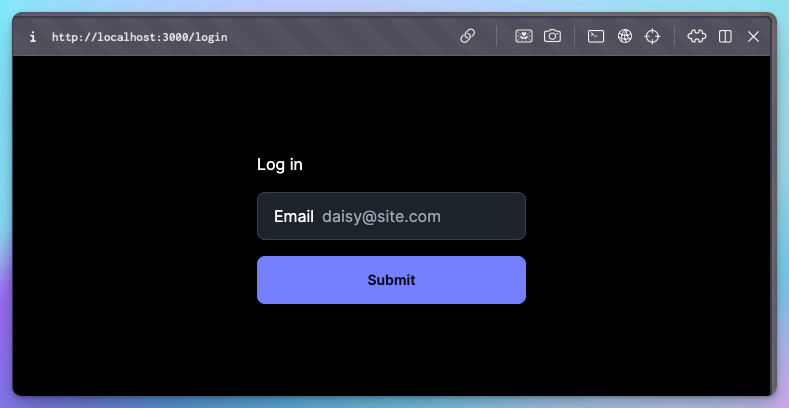
It's time to take our Next.js app for a spin, type in in your terminal:
npm run dev
and head over to localhost:3000. You should see something like this:
Action
Currently, the Submit button doesn't do anything, so let's implement the server action that will trigger Supabase's sing-in flow for us.
Supabase Client util functions
First, you'll need a function to obtain the Supabase client in your server components. These functions aren't built into Supabase, but they are described in their official docs here.
Before creating the util function, make sure to install the core Supabase and the Supabase Server Side Rendering (in beta) packages:
npm install @supabase/supabase-js @supabase/ssr
And now, create the file utils/supabase/server.ts. This is taken from the docs, but I'll explain what it does below.
import { createServerClient, type CookieOptions } from '@supabase/ssr'
import { cookies } from 'next/headers'

export function createClient() {
  const cookieStore = cookies()

  return createServerClient(
    process.env.NEXT_PUBLIC_SUPABASE_URL!,
    process.env.NEXT_PUBLIC_SUPABASE_ANON_KEY!,
    {
      cookies: {
        get(name: string) {
          return cookieStore.get(name)?.value
        },
        set(name: string, value: string, options: CookieOptions) {
          try {
            cookieStore.set({ name, value, ...options })
          } catch (error) {
            // The `set` method was called from a Server Component.
            // This can be ignored if you have middleware refreshing
            // user sessions.
          }
        },
        remove(name: string, options: CookieOptions) {
          try {
            cookieStore.set({ name, value: '', ...options })
          } catch (error) {
            // The `delete` method was called from a Server Component.
            // This can be ignored if you have middleware refreshing
            // user sessions.
          }
        },
      },
    }
  )
}
This util module defines a function createClient that initializes a Supabase client for server-side rendering in a Next.js application. It uses environment variables for the Supabase URL and anonymous key and manages cookies for authentication and session handling. The cookie operations are wrapped in try-catch blocks to handle potential errors when called from server components.
Sign in Action
Inside this Server Action, we'll do three things:
obtain a Supabase client we just created
gather the form data and pass it to Supabase
if there's an error, log it and redirect to the root page. In production, you might want to redirect to a dedicated /error page
Create a file next to page.tsx, called action.tsx:
"use server";

import { createClient } from "@/utils/supabase/server";
import { revalidatePath } from "next/cache";
import { redirect } from "next/navigation";

export async function signIn(formData: FormData) {
  const supabase = createClient();

  const data = {
    email: formData.get("email") as string,
    emailRedirectTo: "/",
  };

  const { error } = await supabase.auth.signInWithOtp(data);

  if (error) {
    console.error("Error logging in:", error.message);
  }

  revalidatePath("/", "layout");
  redirect("/");
}
Connect Action to Page
Finally, call this action on the main form element of the login page:
import { signIn } from "./action";

export default async function Login() {
  return (
    <main className="flex min-h-screen flex-col items-center p-24">
      <form action={signIn} className="flex flex-col gap-4 prose">
        ... no changes here
      </form>
    </main>
  )
};
I know it's tempting, but don't test the form submission yet! You would get the email, but the /auth/confirm route the link would redirect to doesn't exist, so let's create that!
Confirmation Route
Let's create a route handler in app/auth/confirm/route.ts.
This processes a GET request to verify an email OTP (one-time password) from Supabase. It extracts the token_hash, type, and next parameters from the request URL. If both token_hash and type are present, it creates a Supabase client and attempts to verify the OTP.
If the verification is successful, it redirects the user to the next URL, removing the token_hash and type parameters. If the verification fails or the parameters are missing, it redirects the user to an error page.
import { type EmailOtpType } from '@supabase/supabase-js'
import { type NextRequest, NextResponse } from 'next/server'

import { createClient } from '@/utils/supabase/server'

export async function GET(request: NextRequest) {
  const { searchParams } = new URL(request.url)
  const token_hash = searchParams.get('token_hash')
  const type = searchParams.get('type') as EmailOtpType | null
  const next = searchParams.get('next') ?? '/'

  const redirectTo = request.nextUrl.clone()
  redirectTo.pathname = next
  redirectTo.searchParams.delete('token_hash')
  redirectTo.searchParams.delete('type')

  if (token_hash && type) {
    const supabase = createClient()

    const { error } = await supabase.auth.verifyOtp({
      type,
      token_hash,
    })
    if (!error) {
      redirectTo.searchParams.delete('next')
      return NextResponse.redirect(redirectTo)
    }
  }

  // return the user to an error page with some instructions
  redirectTo.pathname = '/error'
  return NextResponse.redirect(redirectTo)
}
We're almost there!
Before we test this, let's just update the root page of our app and render something different when we're logged in!
Authenticated Dashboard
Replace the contents of app/page.tsx with the following:
import { createClient } from "@/utils/supabase/server";
import Link from "next/link";
import { signOut } from "./action";

export default async function Home() {
  const supabase = createClient();

  const { data } = await supabase.auth.getUser();
  const isLoggedIn = !!data?.user;

  if (!isLoggedIn) return <Link href="/login">Log in</Link>;

  return (
    <main className="flex flex-col gap-5 items-center justify-between p-24">
      <div className="z-10 w-full max-w-5xl items-center justify-between font-mono text-sm lg:flex">
        Logged in as {data?.user?.email}
      </div>
      <form action={signOut} className="flex flex-col gap-4 prose">
        <button className="btn btn-primary">Log out</button>
      </form>
    </main>
  );
}
Above is a simple Server-Side Rendered page that does the following:
checks if the user logged in by simply requesting user from the supabase client
if not, returns a link to the
/loginpageif logged in, prints the email of the user and a Log out button
The Log out button will call this simple server action that you can put into app/action.ts:
'use server';

import { createClient } from "@/utils/supabase/server";
import {redirect} from "next/navigation";

export async function signOut() {
  const supabase = createClient();

  await supabase.auth.signOut();
  redirect("/");
}
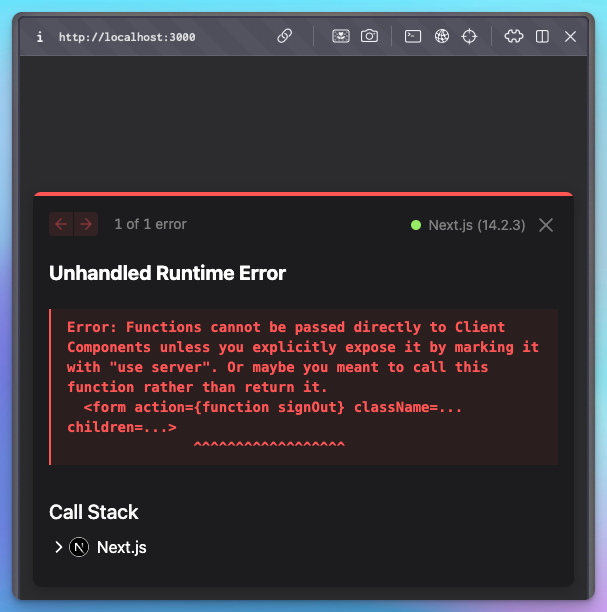
Don't forget 'use server' directive at the top of the file! Otherwise, you'll be getting a message like this in your browser:
Now it's time to test the sign-in!
Open the login page, enter your email address, and click Submit.
⚠️ Note that if you've been testing too intensively, you might get the following error upon sign-in 😅:
Error logging in: Email rate limit exceeded
There is a certain rate limit even for services like SendGrid. Just wait a few minutes, grab tea and coffee, and try again. 😊
If you've been waiting patiently – or didn't exceed your limit – an email like this will be in your mailbox:
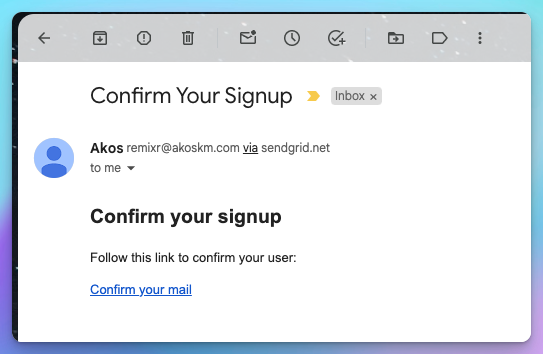
Note that this is our first sign-in, so the email body says Confirm your signup. You'll see soon that it'll look different when we try to sign in for the second time.
Clicking the link or copy-pasting it into your browser should redirect you to the customized dashboard page:
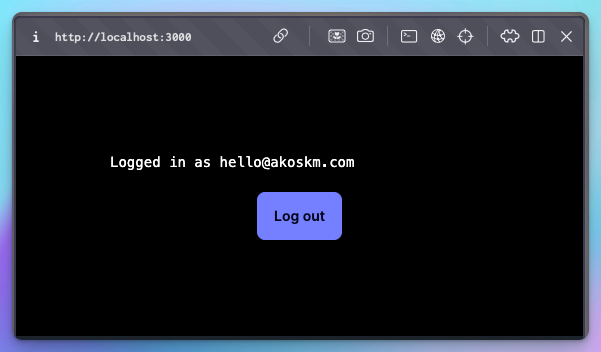
Hitting Log out should take you back to our very simple, unauthenticated page:

And signing in again should send you an email that now looks like this:
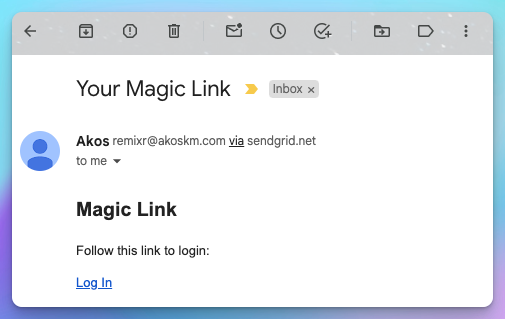
But clicking the link should lead you to the authenticated page, just like after confirming your registration.
Conclusion
Well done! 🎉
You just got yourself a fully functional app with magic-link sign-ins using Next.js, Supabase, and Sendgrid.
If you ask me, I don't think much more is needed here. You have the sign-in and sign-up through the same form and an authenticated and unauthenticated version of a dashboard. What else is needed?
Add a payment system integration and start collecting money for your unique service!
If you'd like to extend your app with some AI features, like taking Voice notes and turning them into blog posts, my recent book is a great way to start, and you're also supporting my work:
I'm curious about what you come up with! Let me know in the comments! 👇
You'll also find this demo on my GitHub: https://github.com/akoskm/magic-link-demo.
Resources
Setting up Server-Side Auth for Next.js - https://supabase.com/docs/guides/auth/server-side/nextjs?queryGroups=router&router=app
Creating a Supabase client for SSR - https://supabase.com/docs/guides/auth/server-side/creating-a-client?queryGroups=environment&environment=server-action
Twilio Integrating with the SMTP API - https://www.twilio.com/docs/sendgrid/for-developers/sending-email/integrating-with-the-smtp-api